> ## Documentation Index
> Fetch the complete documentation index at: https://help.kibu.com/llms.txt
> Use this file to discover all available pages before exploring further.
# Initial Documentation Setup
> Set up your organization and begin your Kibu Journey.
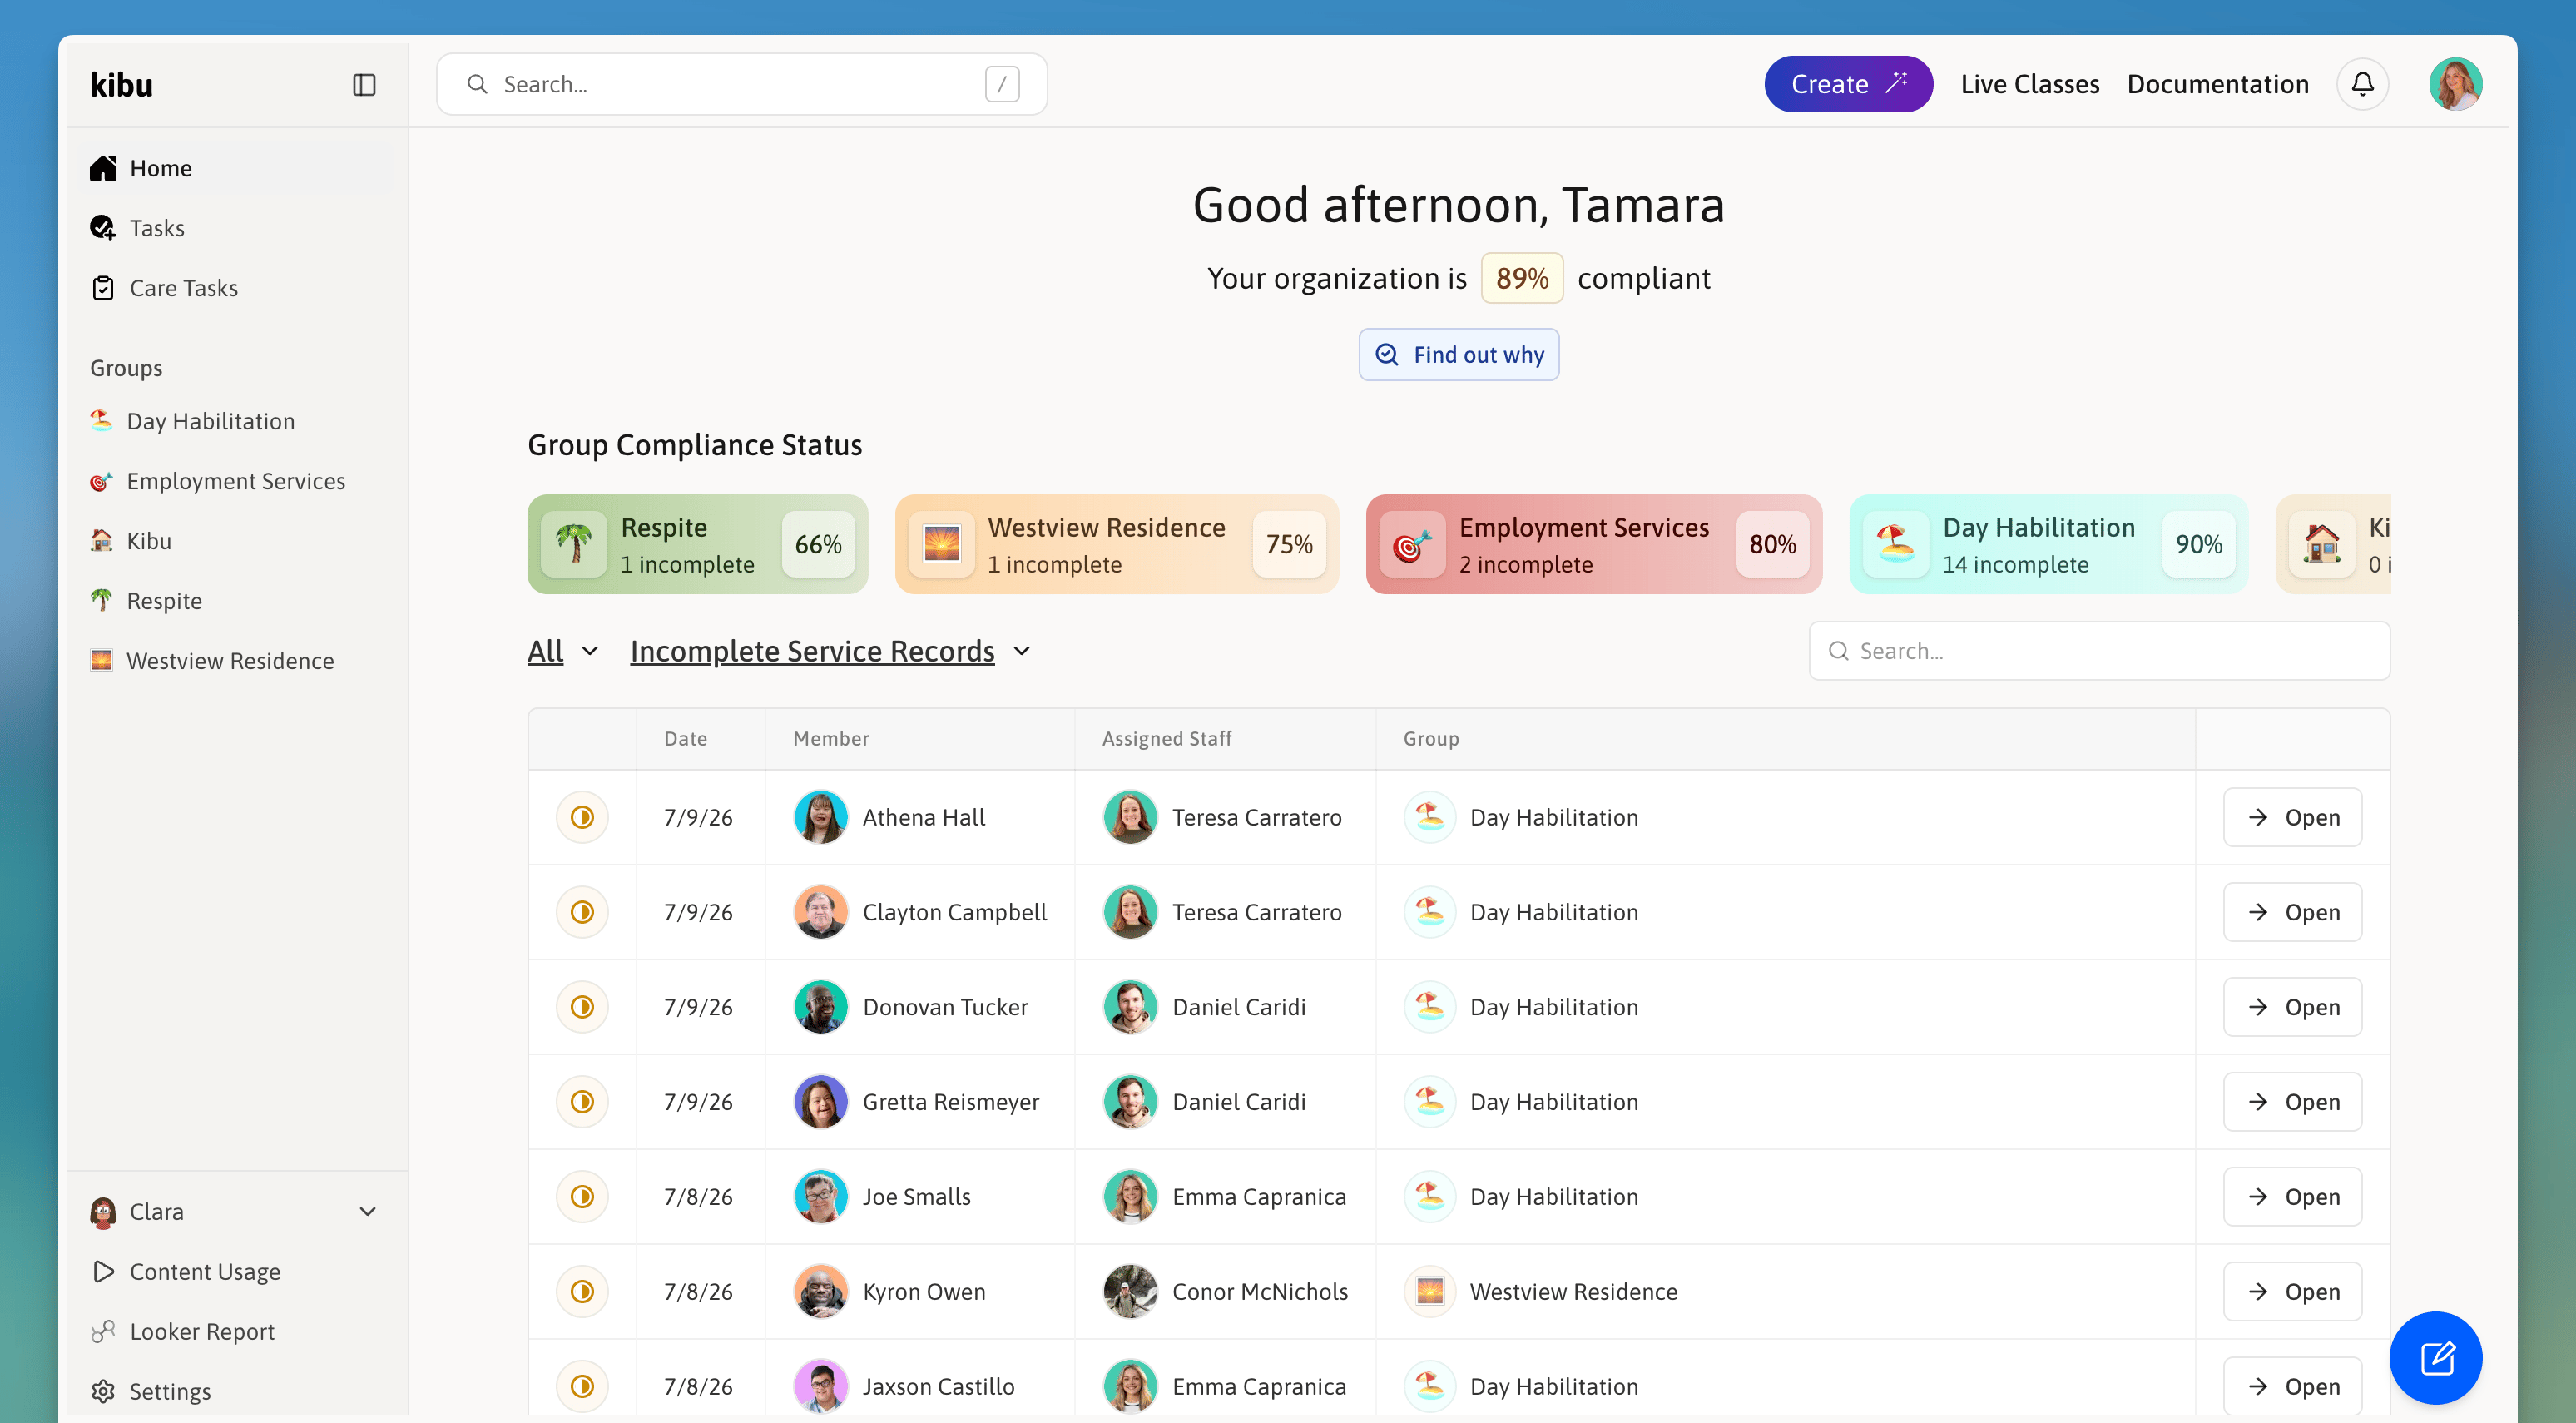 This guide will help you configure Kibu's documentation system for your organization once you have created your account. Proper setup ensures your staff can efficiently record services, maintain compliance, and manage member documentation effectively.
To get started head to settings.
***
## Documentation Platform Setup
It is important the name of your group accurately reflects the program your members are participating in.
If you need help with setup, you can invite your fellow administrators: Go to Settings, under the Users & Access tab you will see a blue button saying "Invite Admins". They will have permissions to create groups and upload members. View the steps below for more detail.
Now that your groups are created its time to add your other admins and staff. From here, you will see a table where a roster of your staff members will live.
It is important to assign appropriate permissions based on their role. You can review the permissions list under the Roles tab.
For example: day habilitation, residence, etc.
Once you press "Invite" they will be added to their groups and receive an email to create a password, once this is complete they will be able to access Kibu.
Perfect for adding multiple staff members efficiently, particularly for larger organizations. Select the **Bulk Staff Upload** button to begin.
Download the excel sheet template.
Open the template and fill in staff information:
* First and last names
* Email address
* Names of the groups they should be assigned to
* Role (Permission level)
Click the bulk upload button and select or drag and drop your file.
Press the upload button. The system will notify you of any missing required information.
Review our [Staff Permissions & Roles](/documentation/staff-permissions) guide, located under documentation, to understand which role best fits each staff member's needs.
Adding members can be found under the Users & Access tab in Settings - Members.
You have two options for adding members to Kibu:
Add members one at a time and immediately select the groups you wish to assign them to. Select the **Add Members** button to do so. You can also add members by using bulk upload. Please download the template, add the information of your members and upload the document again.
Perfect for adding multiple members efficiently, particularly for larger organizations. Select the **Bulk Member Upload** button to begin.
This guide will help you configure Kibu's documentation system for your organization once you have created your account. Proper setup ensures your staff can efficiently record services, maintain compliance, and manage member documentation effectively.
To get started head to settings.
***
## Documentation Platform Setup
It is important the name of your group accurately reflects the program your members are participating in.
If you need help with setup, you can invite your fellow administrators: Go to Settings, under the Users & Access tab you will see a blue button saying "Invite Admins". They will have permissions to create groups and upload members. View the steps below for more detail.
Now that your groups are created its time to add your other admins and staff. From here, you will see a table where a roster of your staff members will live.
It is important to assign appropriate permissions based on their role. You can review the permissions list under the Roles tab.
For example: day habilitation, residence, etc.
Once you press "Invite" they will be added to their groups and receive an email to create a password, once this is complete they will be able to access Kibu.
Perfect for adding multiple staff members efficiently, particularly for larger organizations. Select the **Bulk Staff Upload** button to begin.
Download the excel sheet template.
Open the template and fill in staff information:
* First and last names
* Email address
* Names of the groups they should be assigned to
* Role (Permission level)
Click the bulk upload button and select or drag and drop your file.
Press the upload button. The system will notify you of any missing required information.
Review our [Staff Permissions & Roles](/documentation/staff-permissions) guide, located under documentation, to understand which role best fits each staff member's needs.
Adding members can be found under the Users & Access tab in Settings - Members.
You have two options for adding members to Kibu:
Add members one at a time and immediately select the groups you wish to assign them to. Select the **Add Members** button to do so. You can also add members by using bulk upload. Please download the template, add the information of your members and upload the document again.
Perfect for adding multiple members efficiently, particularly for larger organizations. Select the **Bulk Member Upload** button to begin.
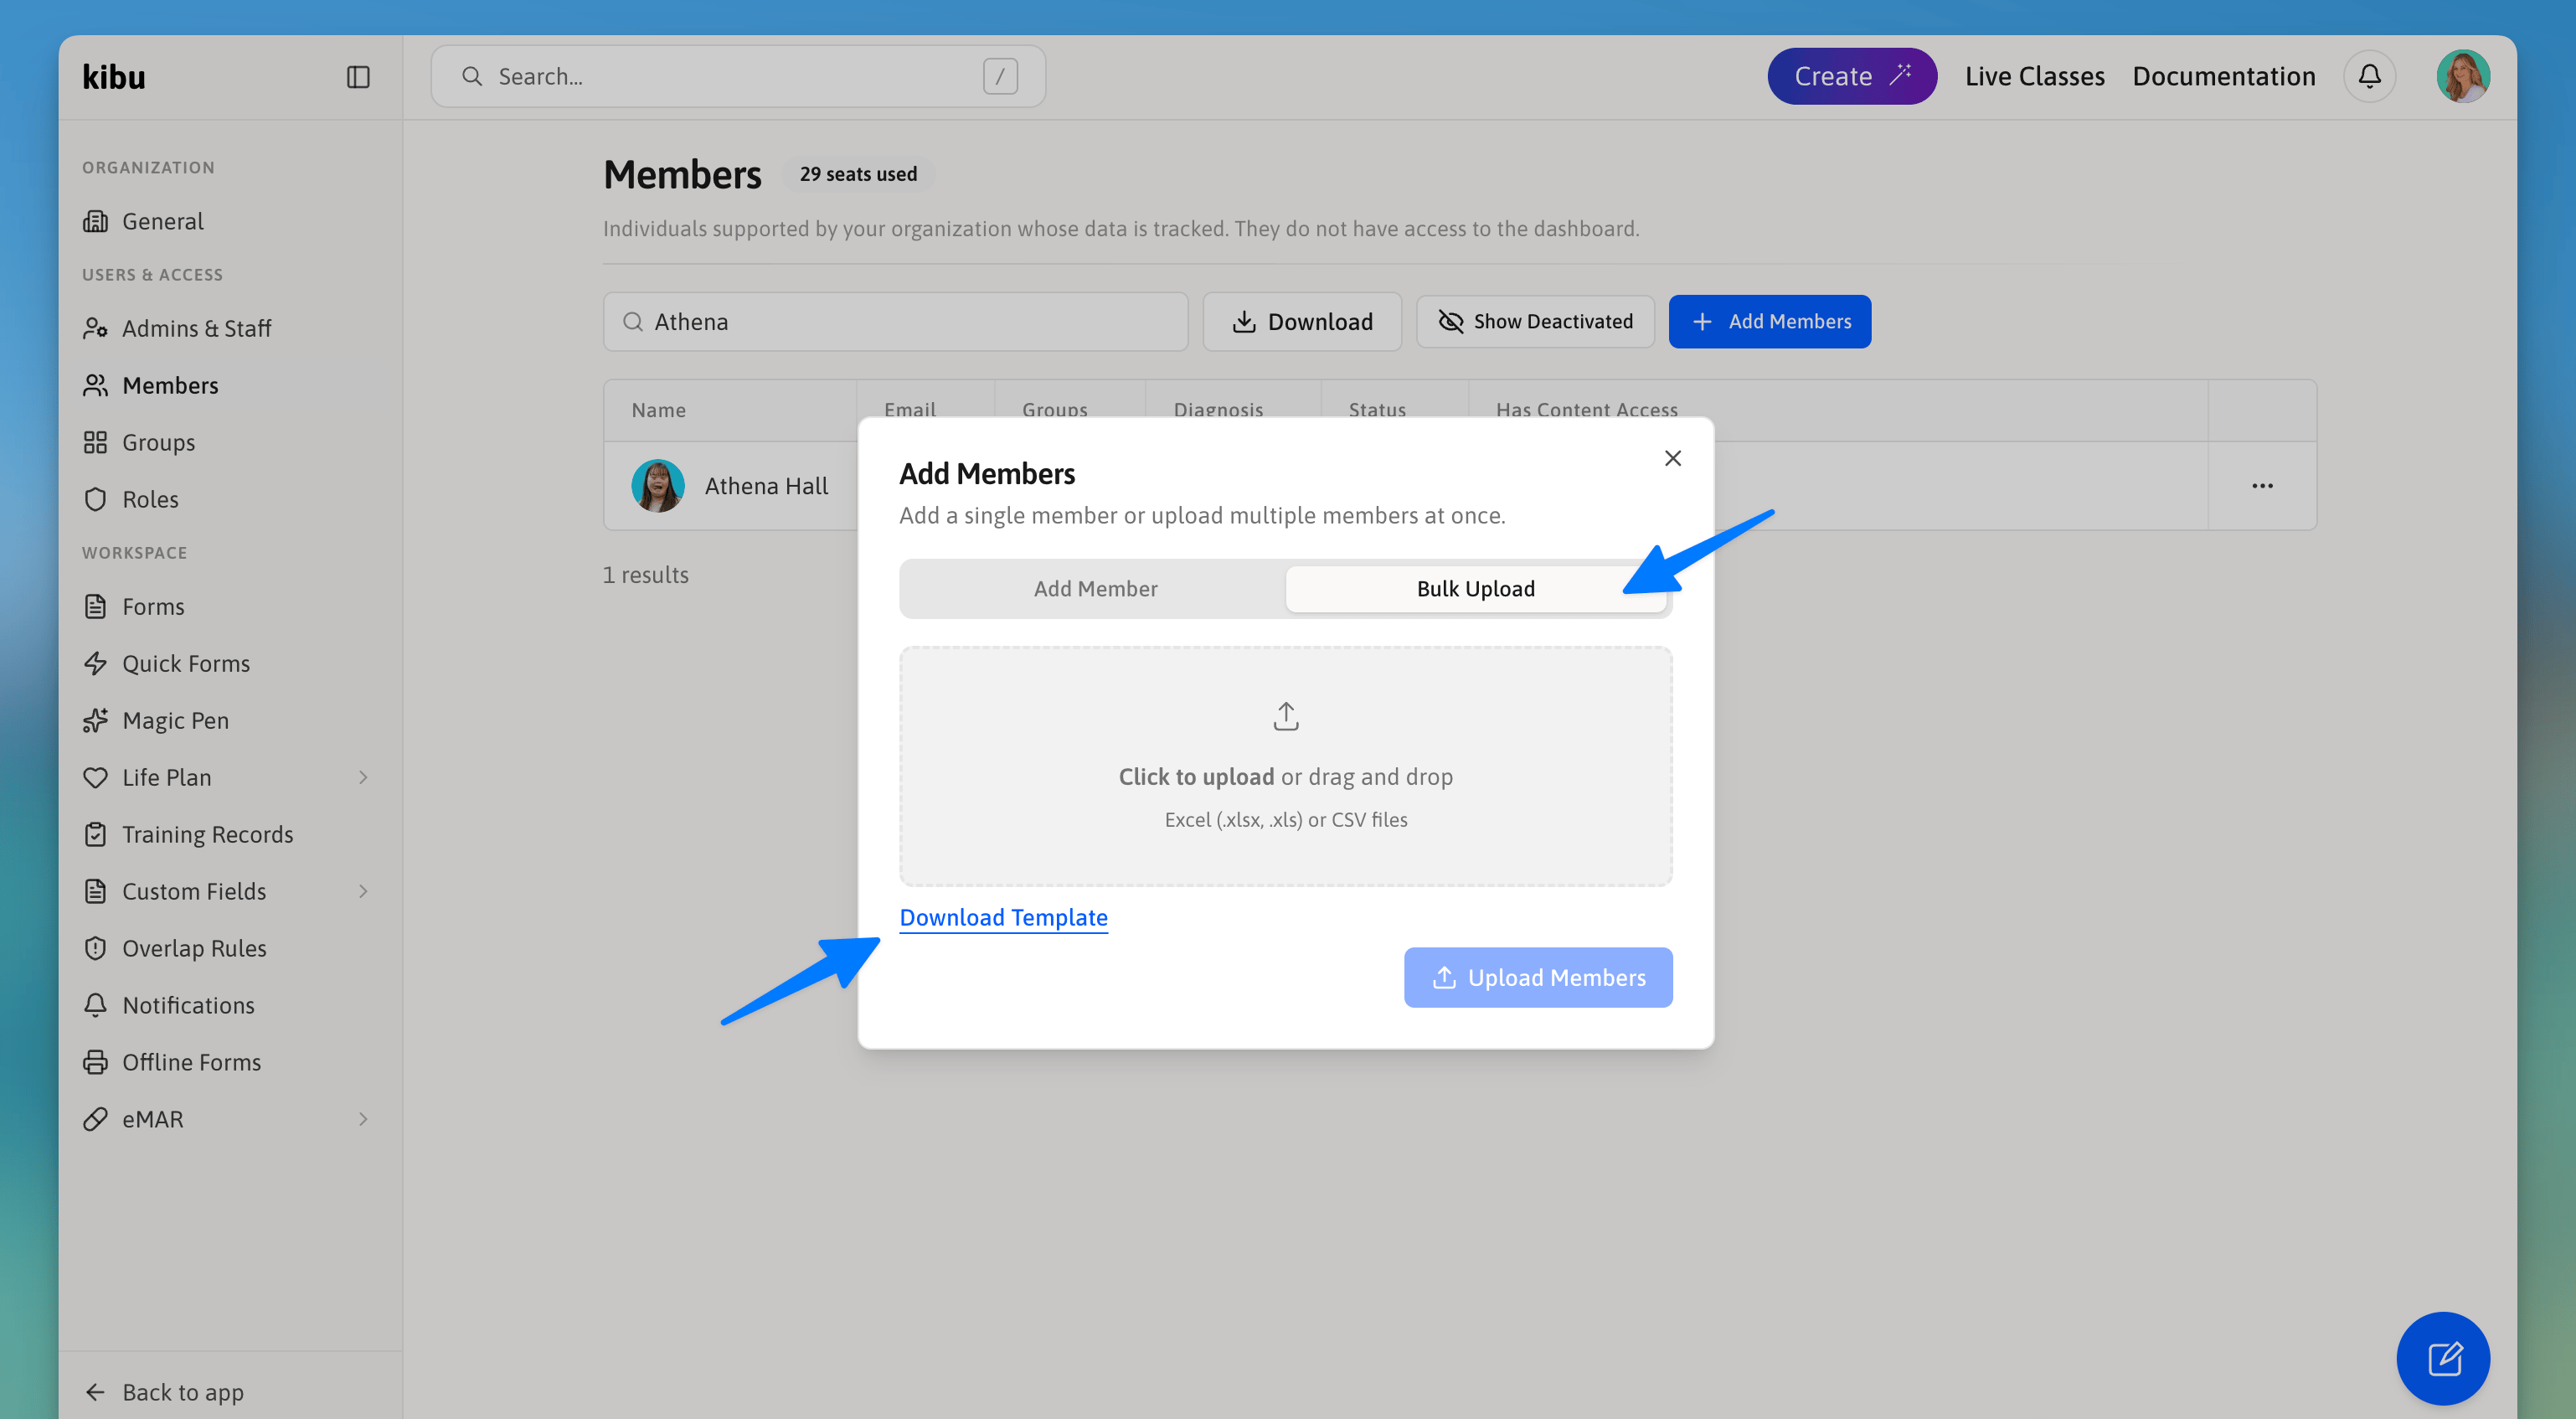 Download the excel sheet template.
Open the template and fill in member information:
* First and last names are required
* Additional information can be added now or later
* We recommend completing all information now as it saves time and allows for more complete profile of each member
Click the bulk upload button and select or drag and drop your exported file.
Press the upload button. The system will notify you of any missing required information.
**Your All Set!**
First and last names as well as the group assignment.
You have completed the initial setup for your organization. Here are the next steps to continue making the most of Kibu:
Set up personalized goals and track progress for your members to ensure meaningful outcomes and growth.
Customize your groups with specific documentation requirements, schedules, and service types to streamline operations.
Download the excel sheet template.
Open the template and fill in member information:
* First and last names are required
* Additional information can be added now or later
* We recommend completing all information now as it saves time and allows for more complete profile of each member
Click the bulk upload button and select or drag and drop your exported file.
Press the upload button. The system will notify you of any missing required information.
**Your All Set!**
First and last names as well as the group assignment.
You have completed the initial setup for your organization. Here are the next steps to continue making the most of Kibu:
Set up personalized goals and track progress for your members to ensure meaningful outcomes and growth.
Customize your groups with specific documentation requirements, schedules, and service types to streamline operations.