

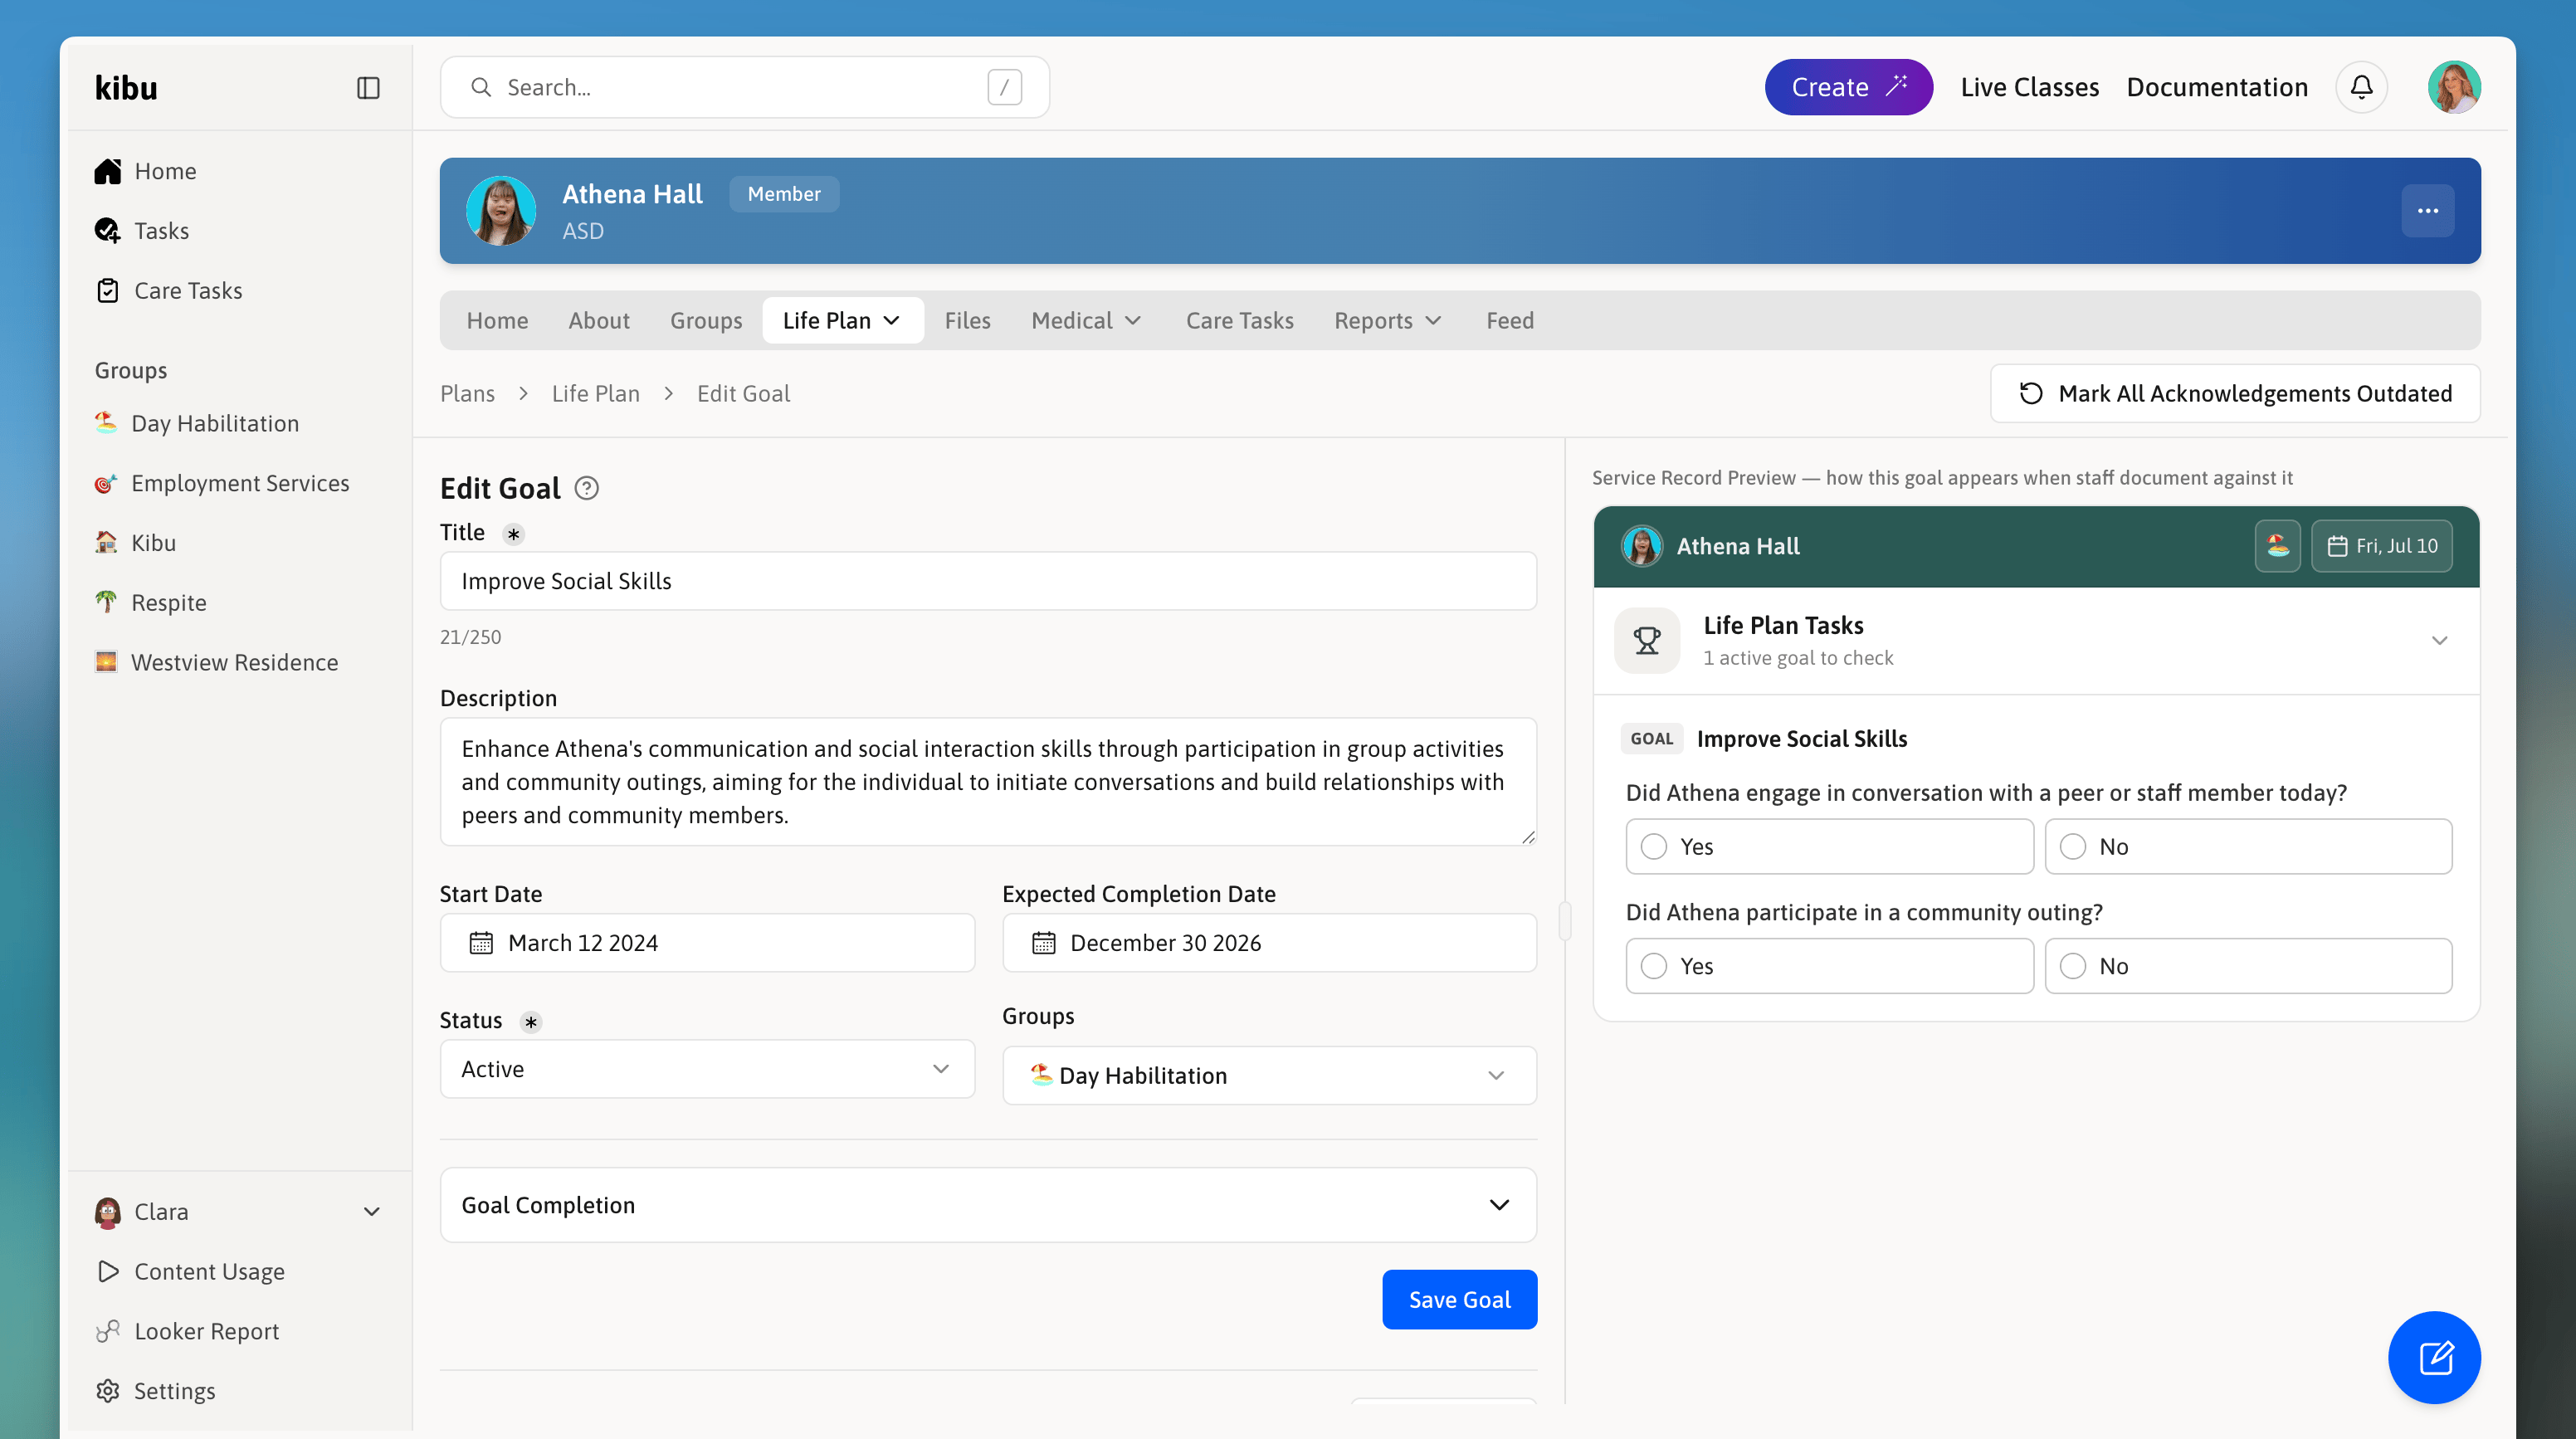
The goal builder, where you create individualized goals and the tasks staff answer for each member.
Before You Begin
Ensure you have:- Your groups correctly created
- Member(s) added to their correct group assignments
 New Goal, then select Copy from Member to pick goals from another member, or Copy from Goal Title to search for goals by title. The goals and their tasks are copied into this member’s plan, where you can customize them.
Step-by-Step Creation Process
Open the Goal Builder
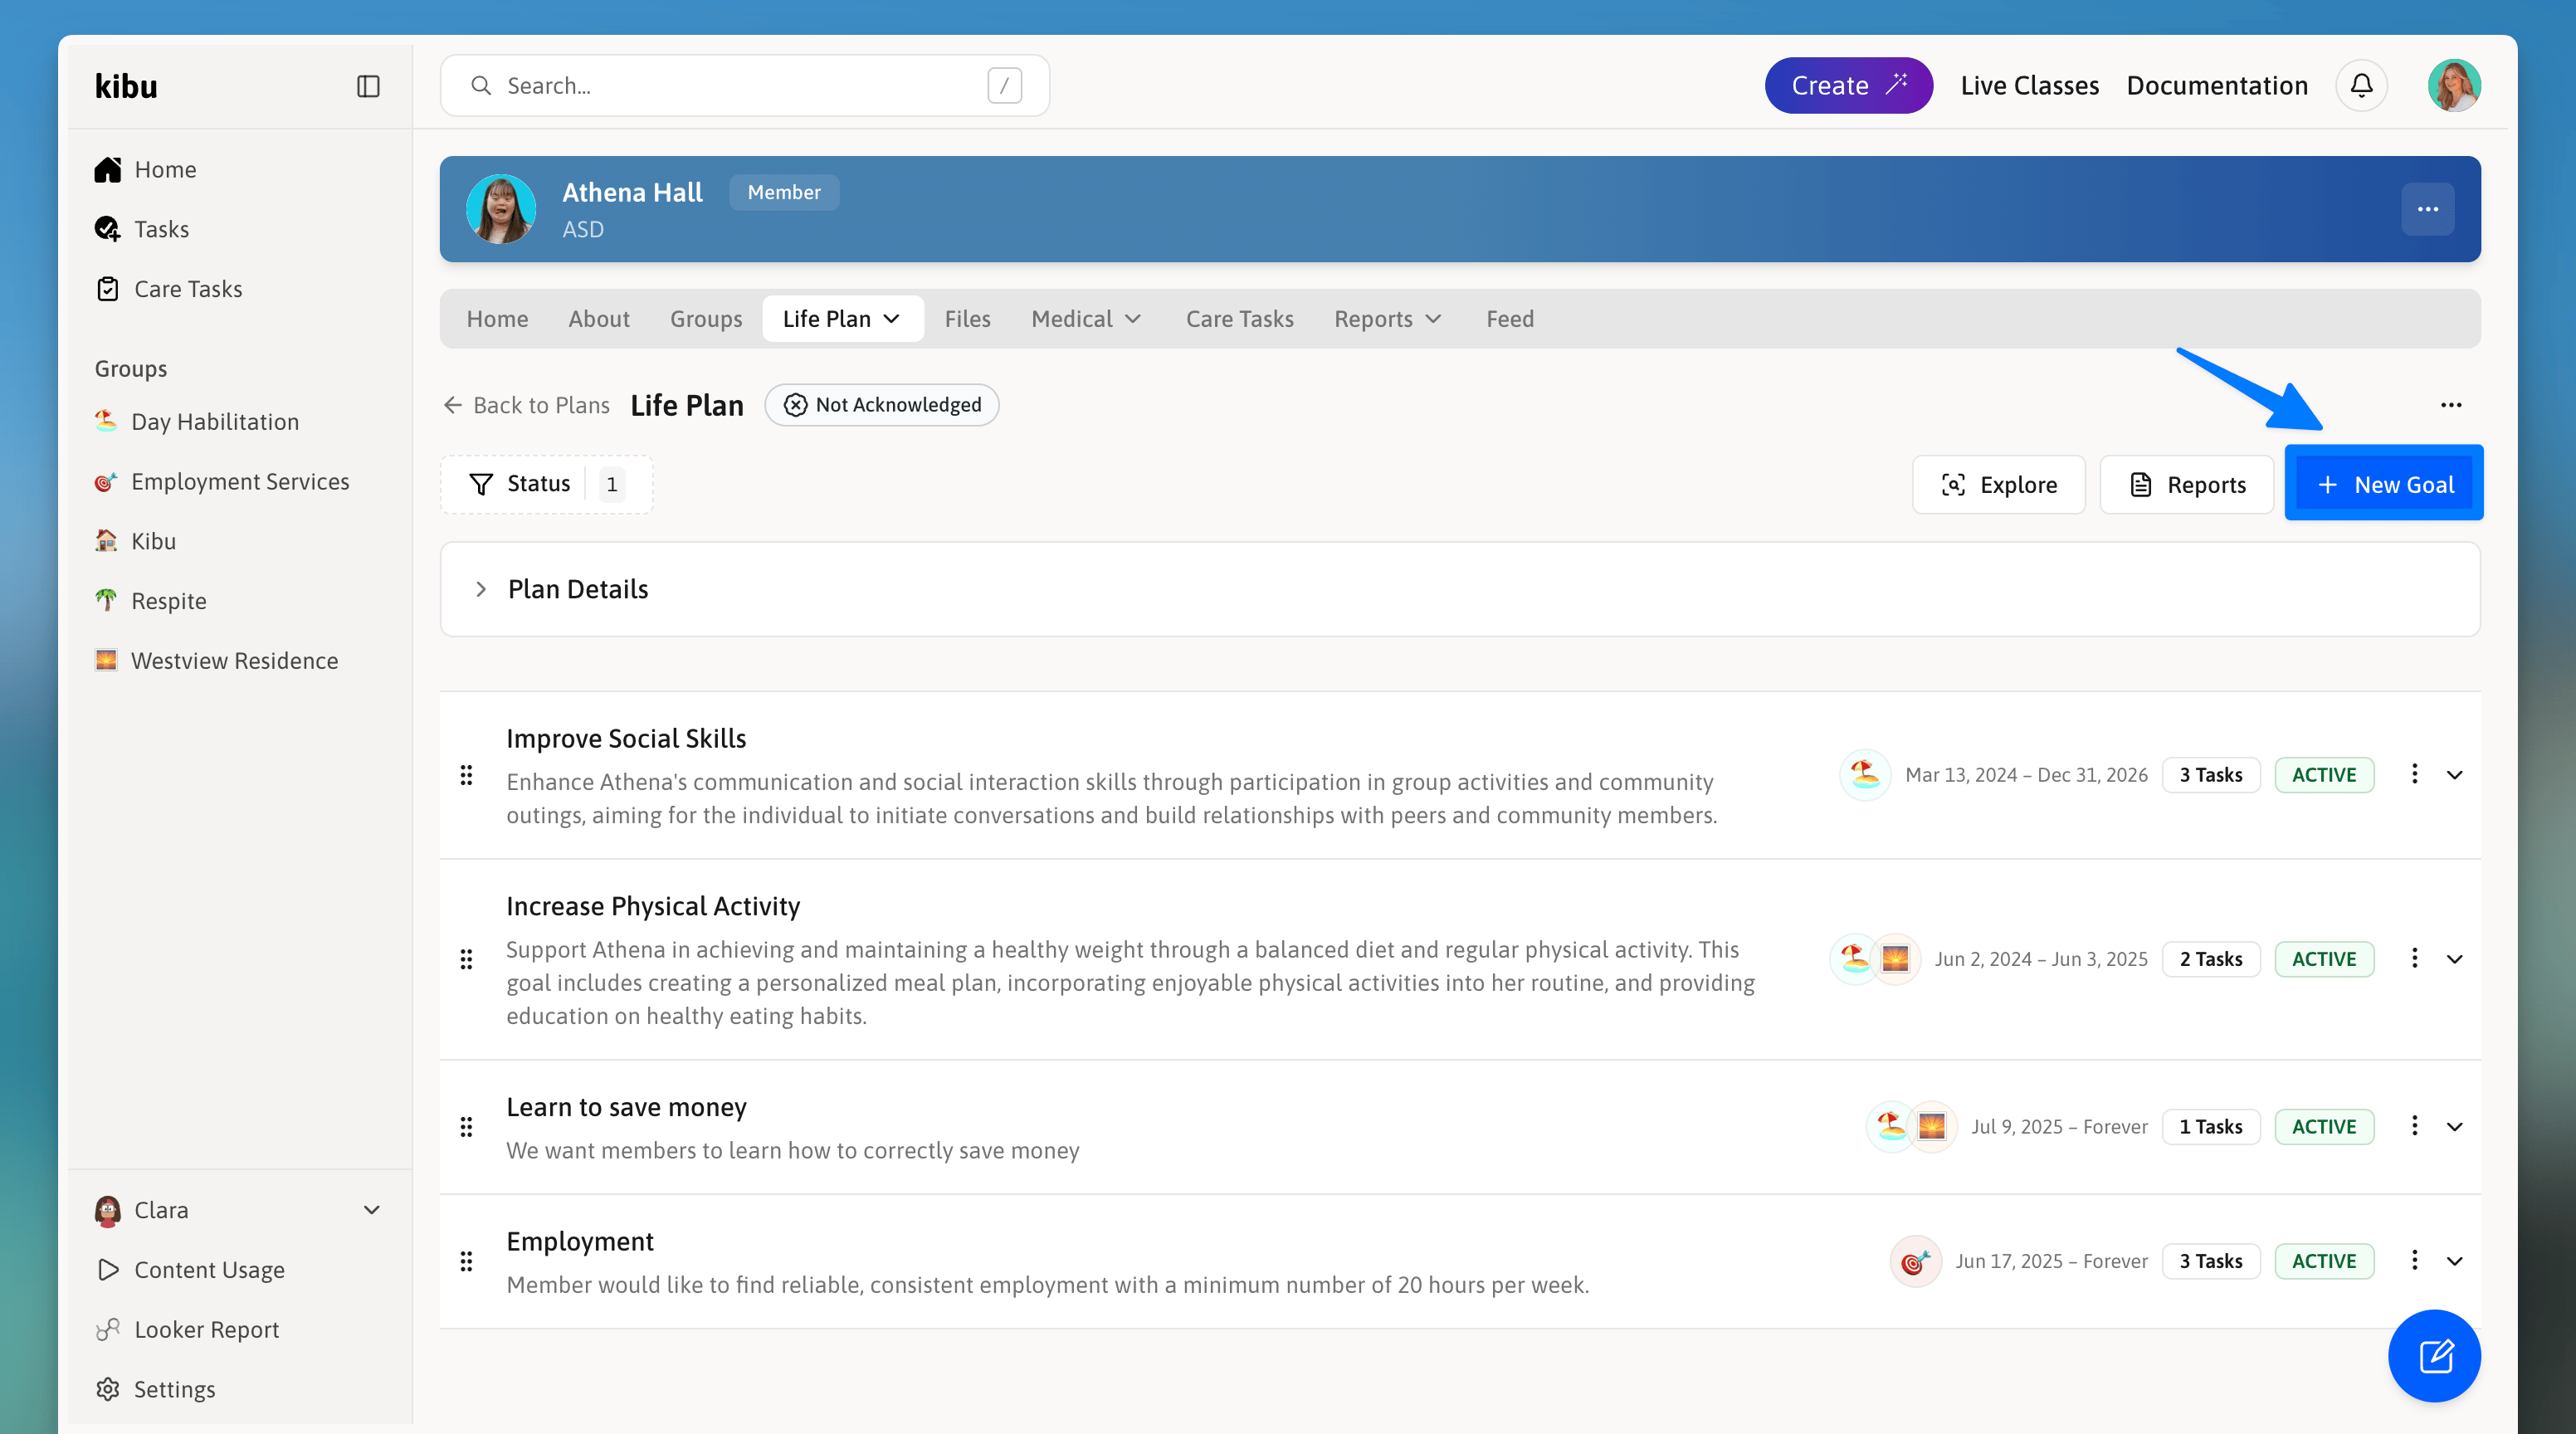
A member's life plan, showing the New Goal button.
Navigate to the Member's profile
Select Life Plan, then View Plans
Click New Goal, then select Create New Goal
Basic Goal Setup
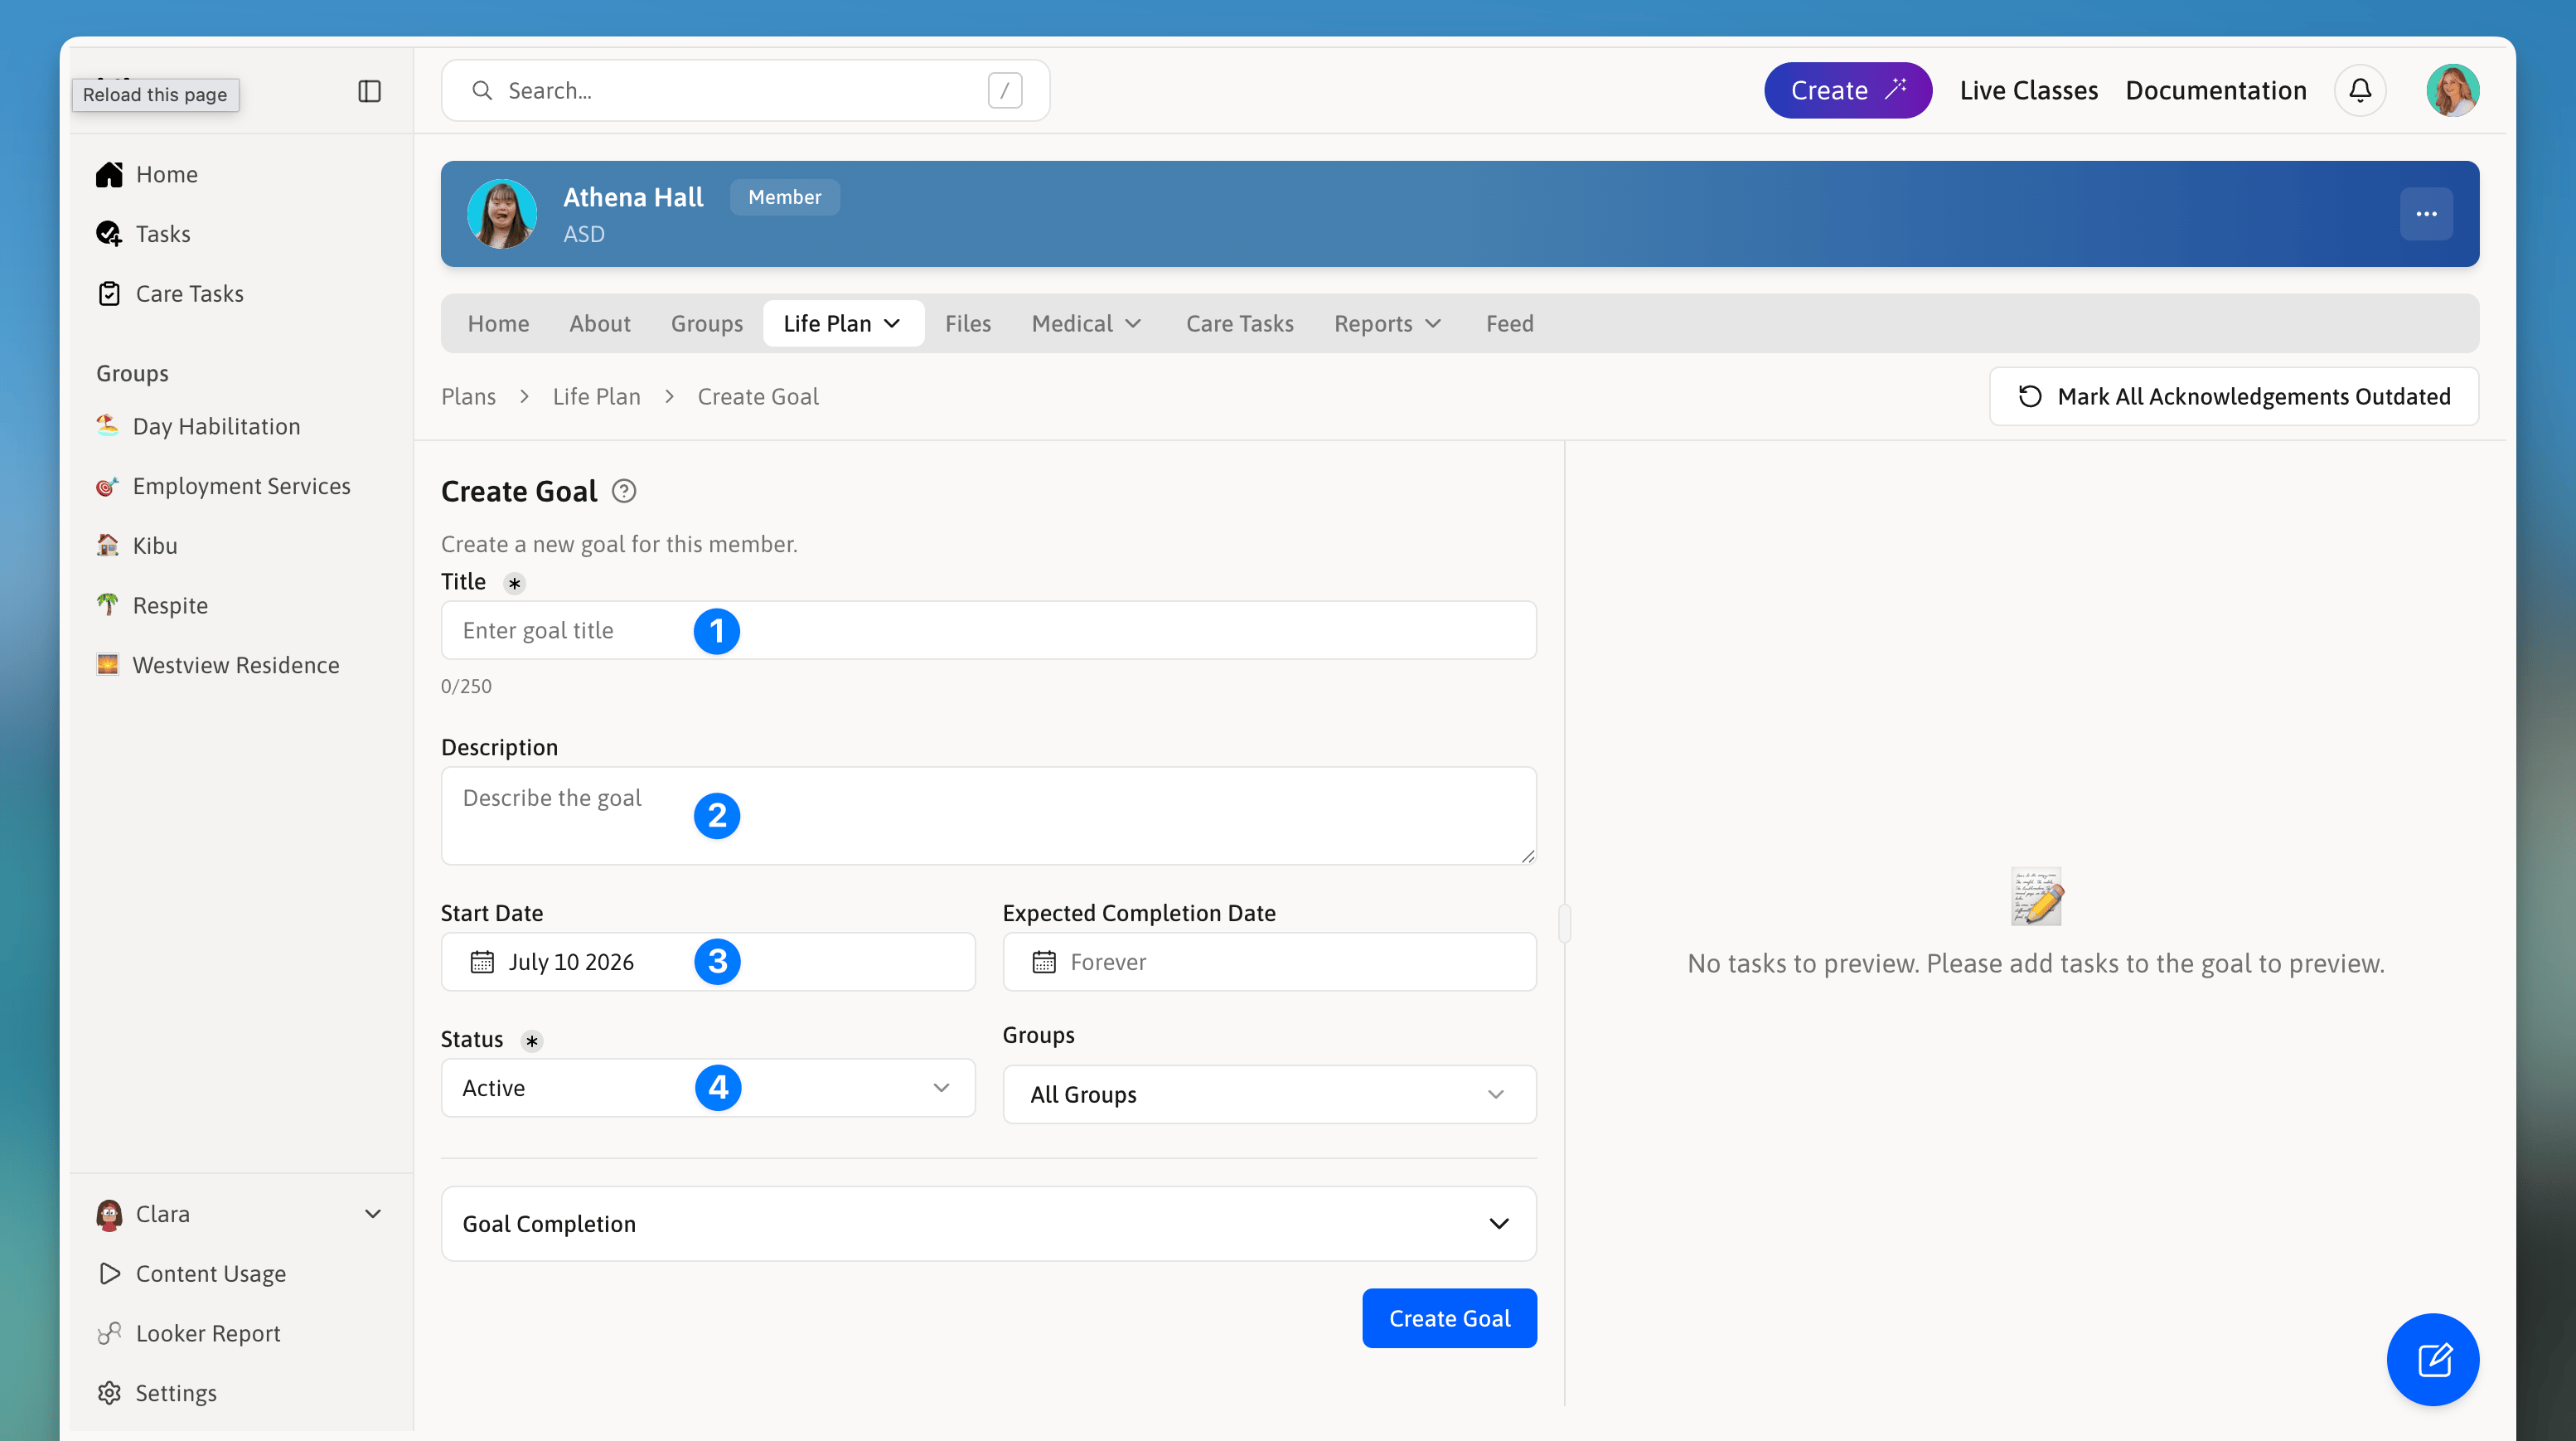
The Create Goal form where you enter the goal's title, description, dates, and groups.
- Title: Enter a clear, descriptive name.
- Description: Provide context about the goal.
- Expected Completion Date: Set the completion timeframe if this is a goal with a deadline. Leave it blank for an ongoing goal.
- Groups: Select which group(s) will track this goal for the specific member.
- Create Goal: Once you are satisfied with your goal details, click Create Goal. The goal builder opens, where you add tasks.
Choose a Task Type
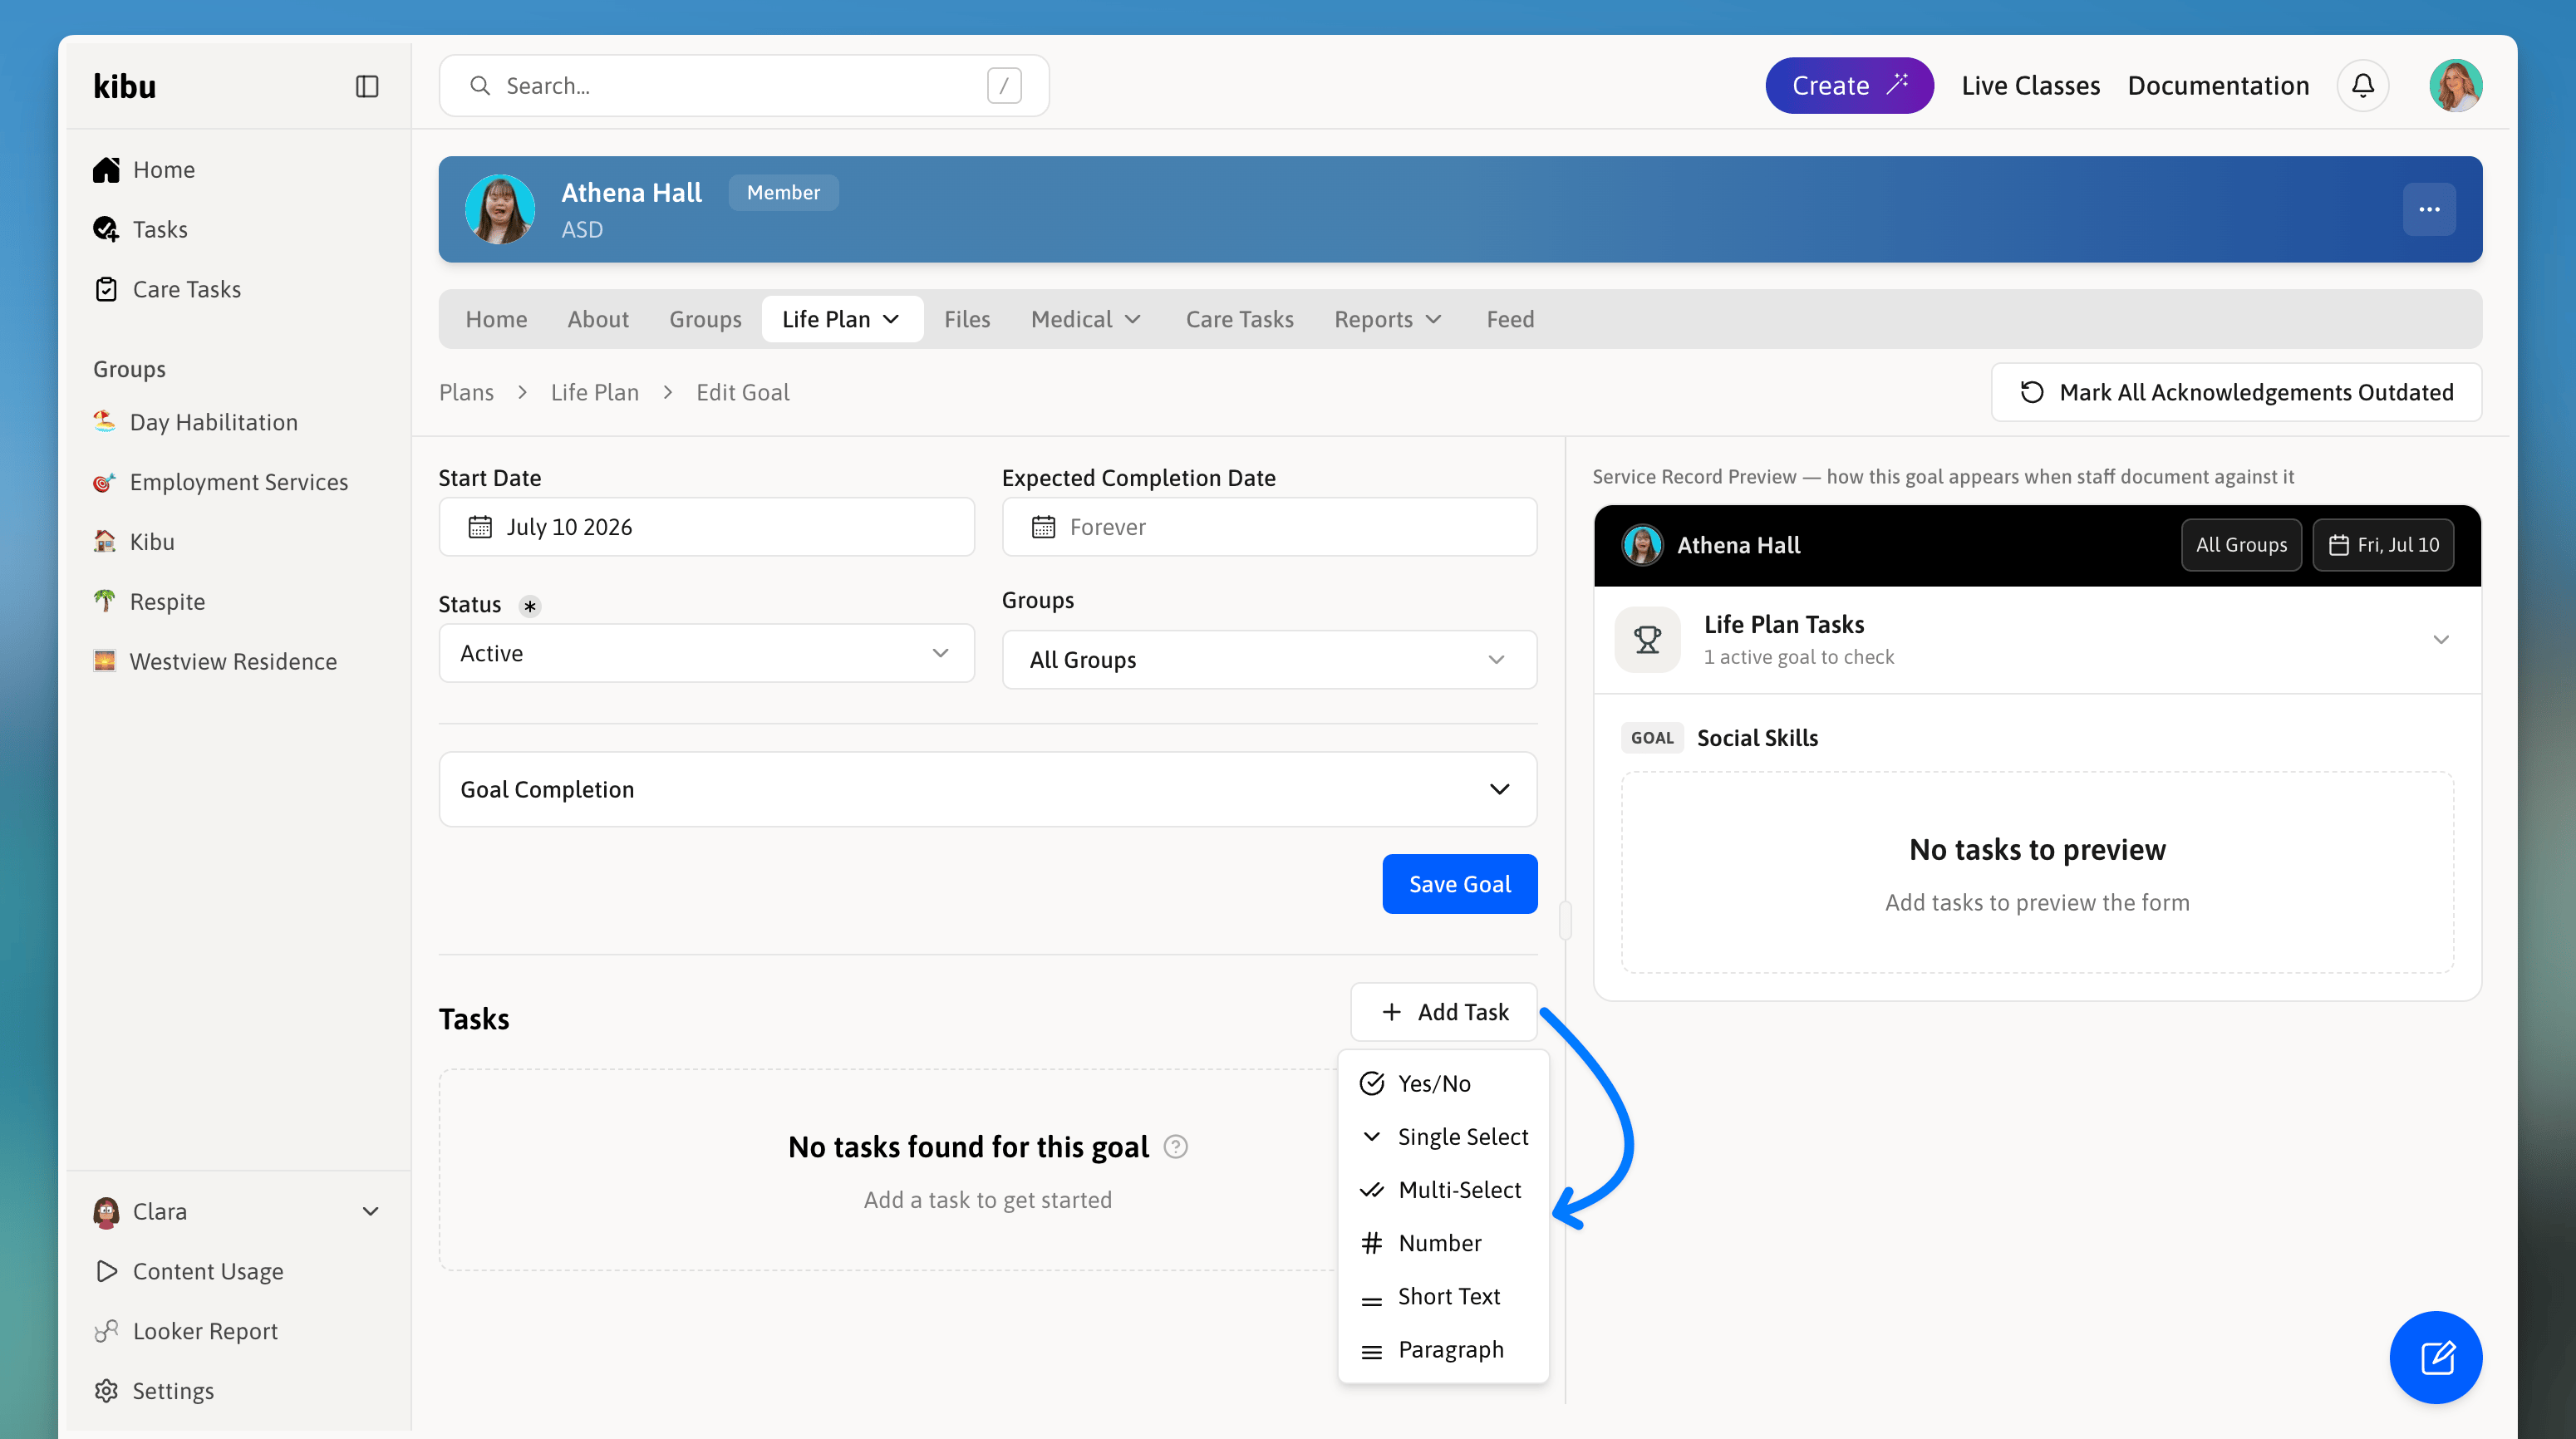
The Add Task menu showing the task types for a Life Plan Goal.
- Yes/No: Best for clear, binary outcomes. Example: “Did [Member] participate in the activity today?”
- Single Select: Best for choosing one option from multiple choices. Example: “What level of support was needed today?” with Independent, Minimal Support, Full Support.
- Multi-Select: Best for selecting multiple applicable options. Example: “Which activities did [Member] engage in today?” with Art, Music, Movement, Social Interaction.
- Number: Best for quantifiable goals. Example: “How many minutes did [Member] engage in the activity today?”
- Short Text: Best for brief responses or quick notes. Example: “What was [Member]‘s initial reaction?”
- Paragraph: Best for detailed observations and comprehensive notes. Example: “Describe [Member]‘s interaction during the activity and any notable behaviors observed.”
Add Your First Tasks
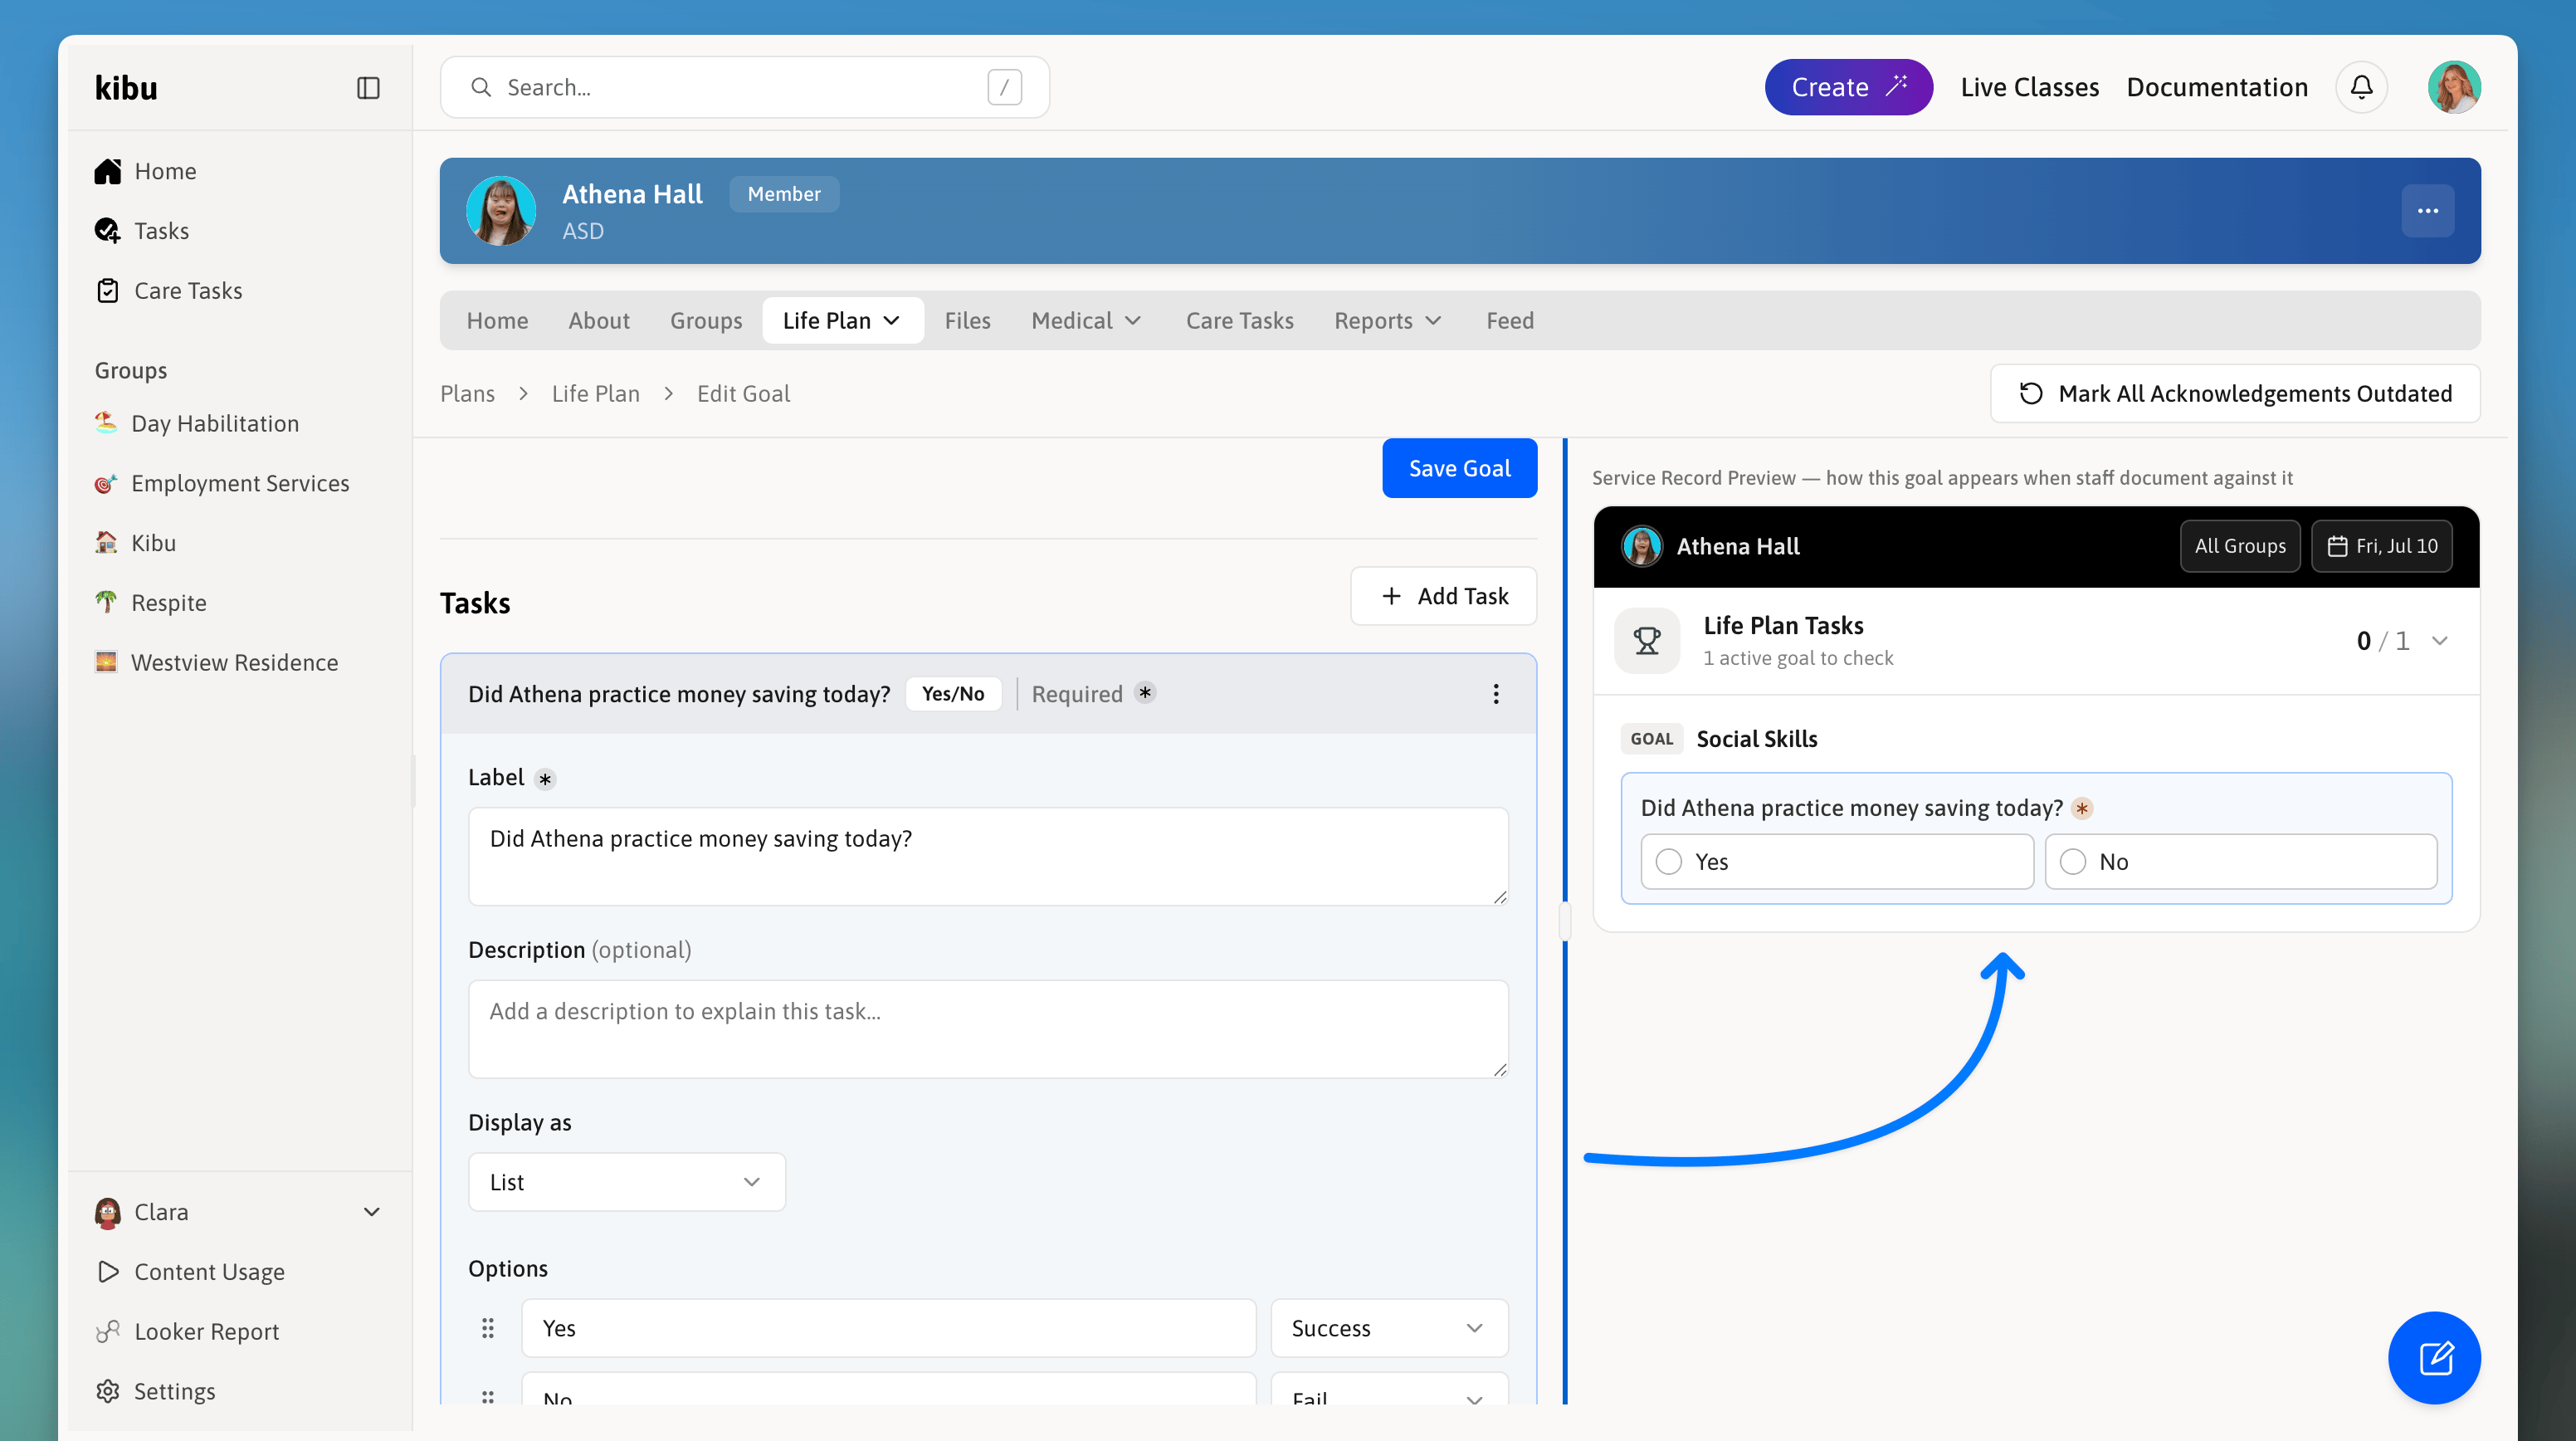
The Life Plan Goal builder preview panel showing how the goal will appear to staff when filling out a service record.
Create Follow-Up Responses or Questions
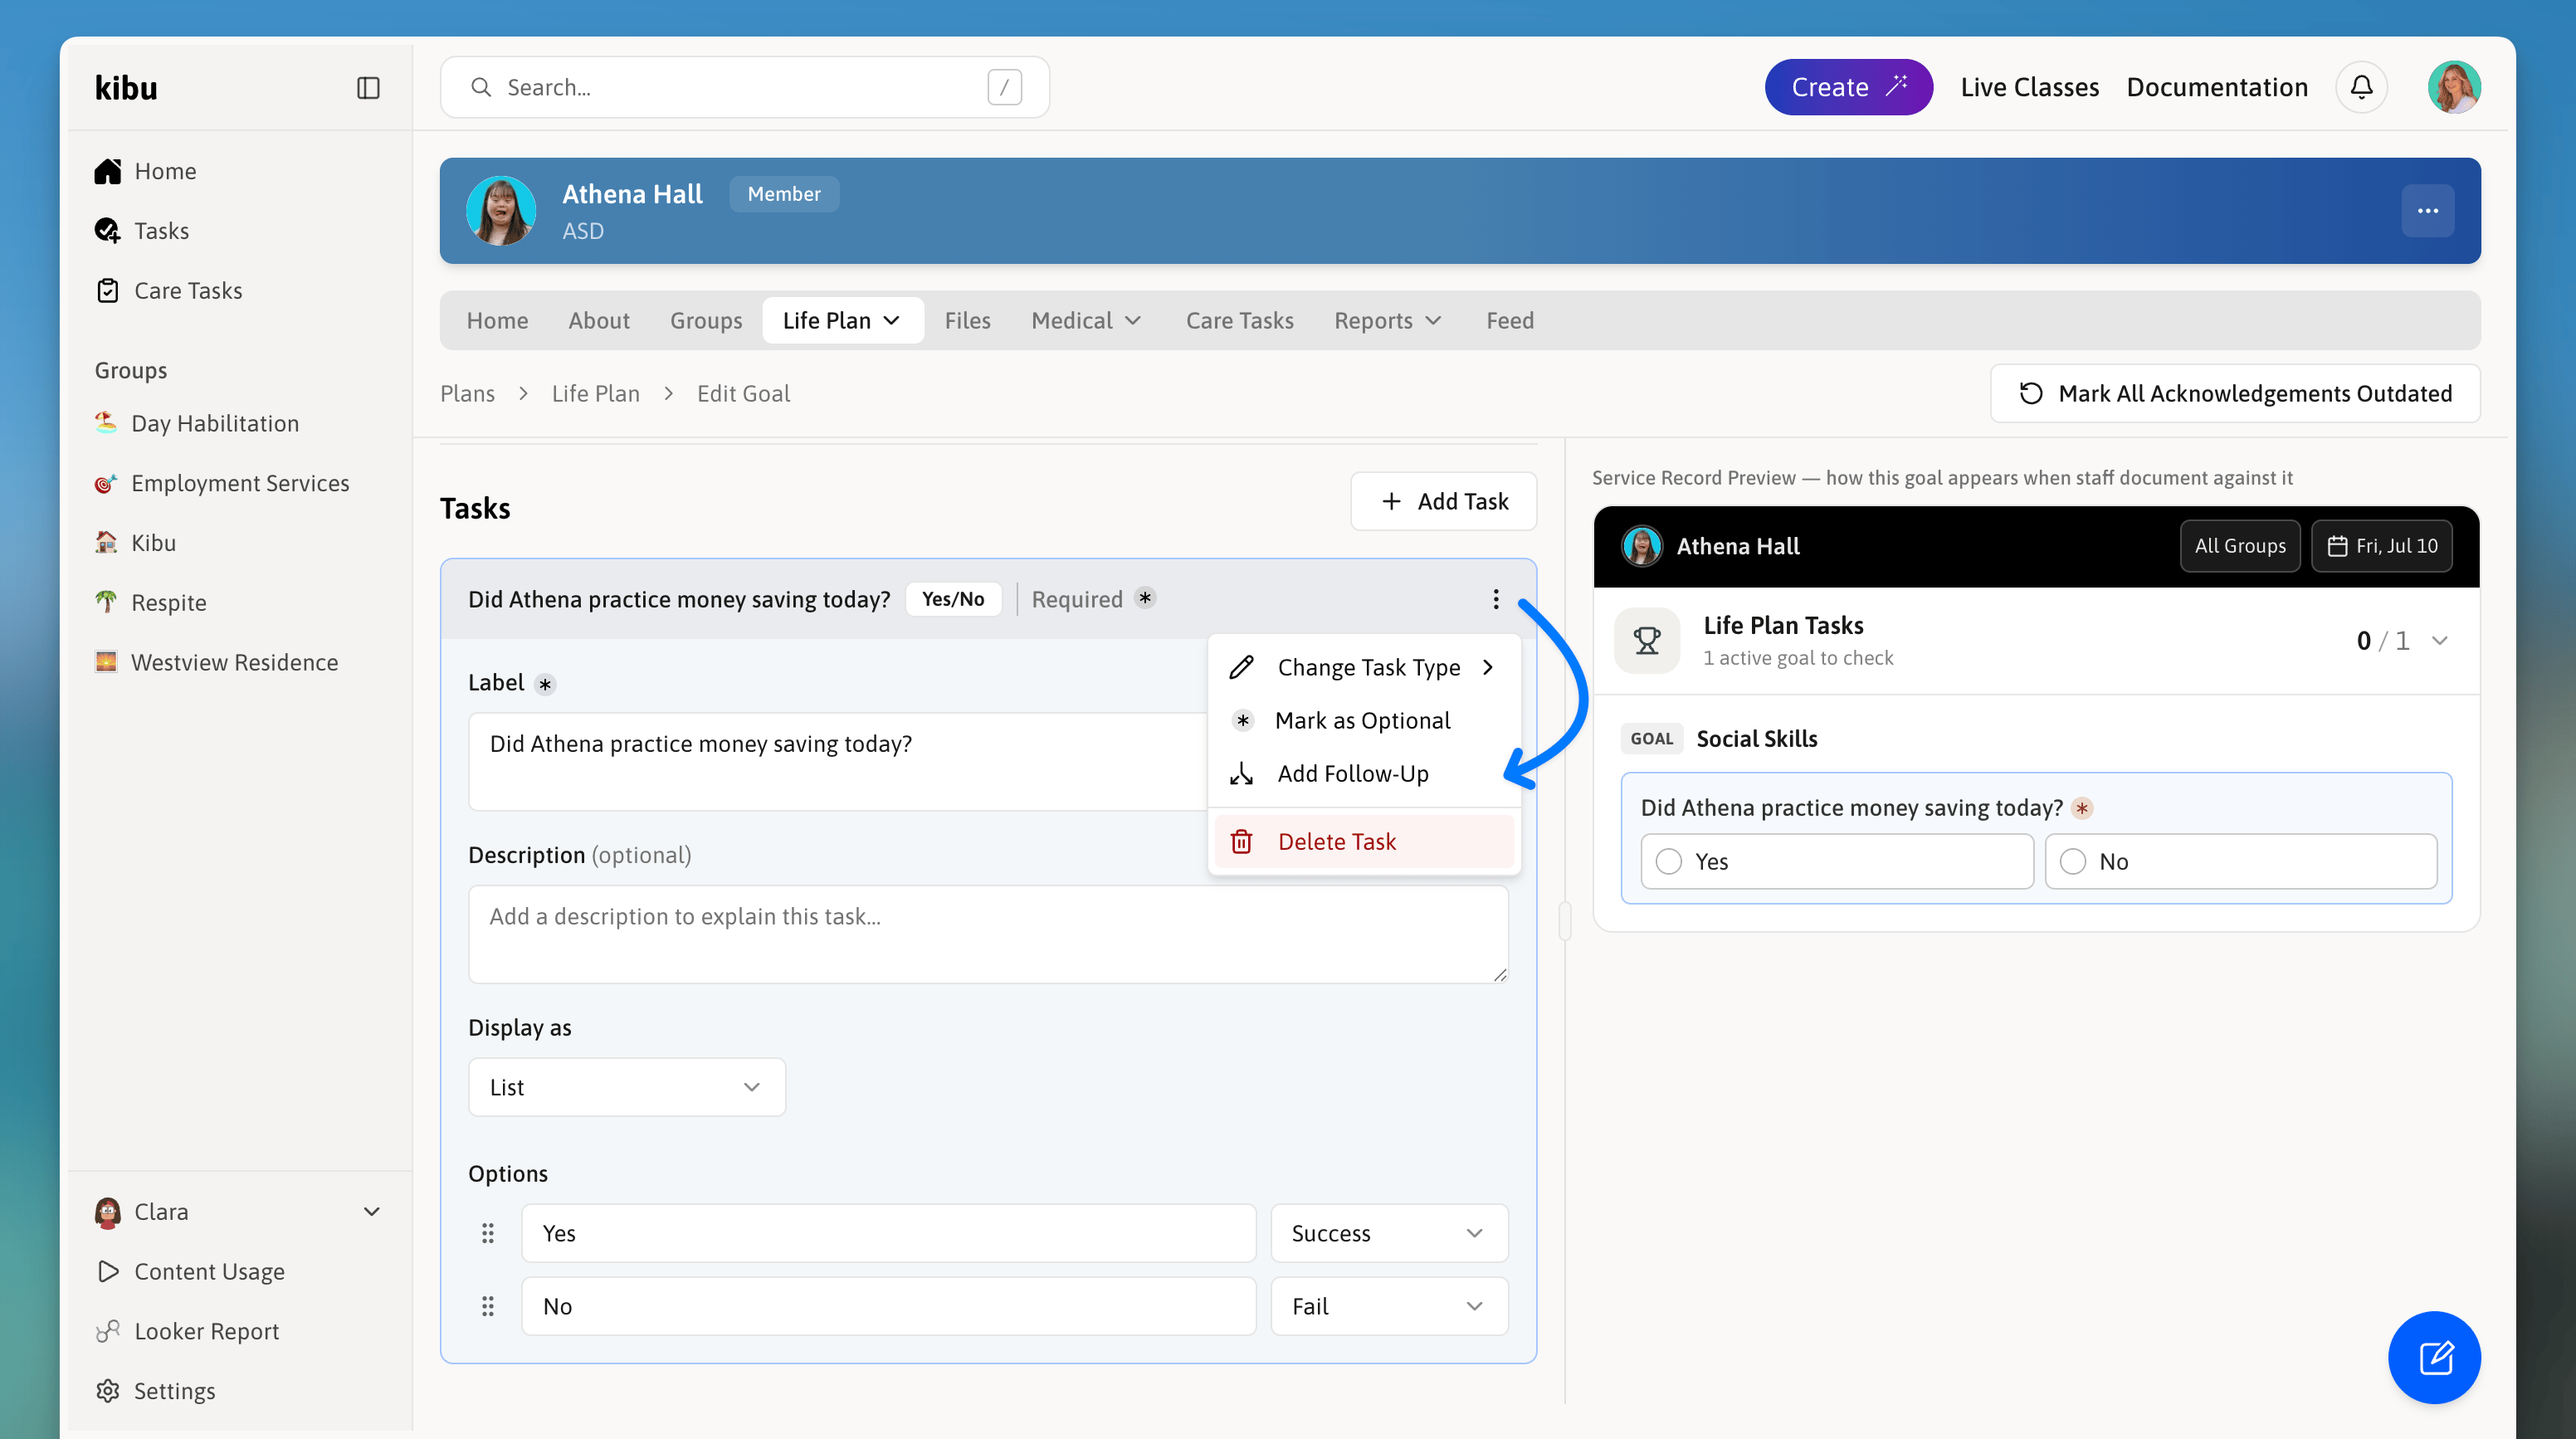
The follow-up question configuration panel, showing trigger response selection and follow-up format options.
Add Follow-up Questions
Select the trigger response
Choose the response format
Configure the follow-up question
Complete Your Goal
Preview how it will appear to staff
Test the questions
Confirm group assignments
Click Save Goal
Multiple Life Plans Per Member
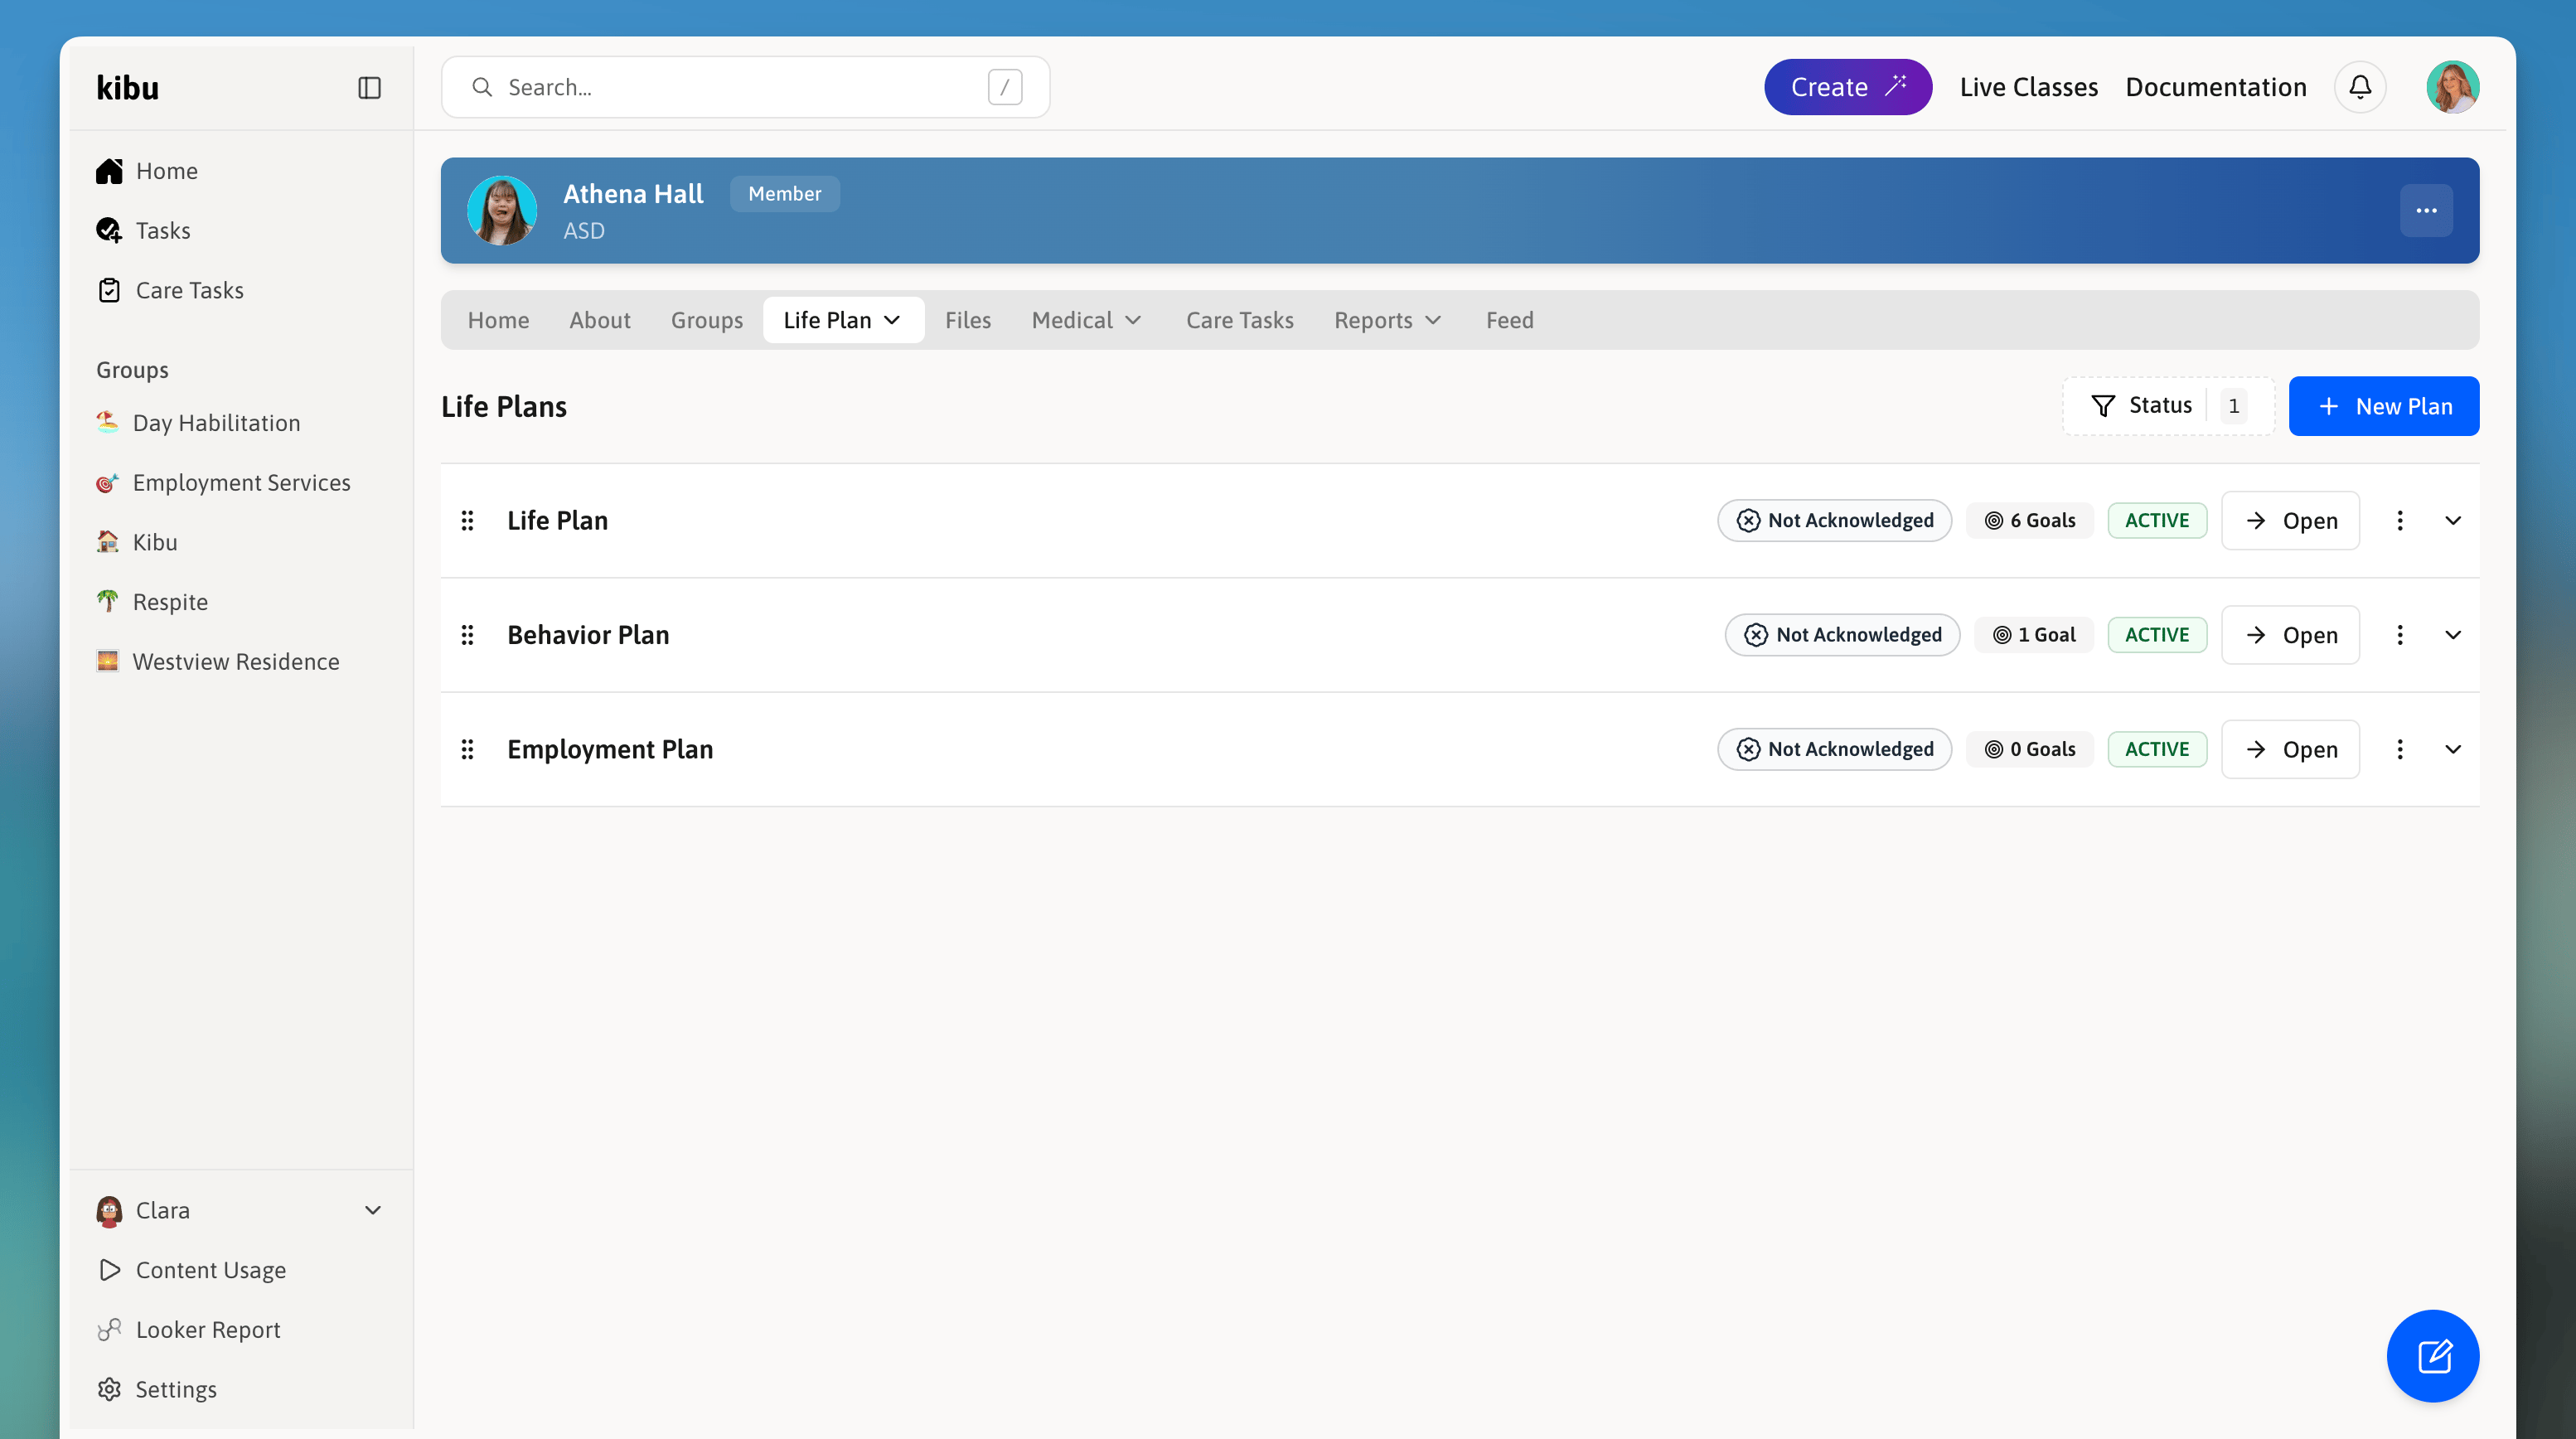
A member's Life Plans list showing multiple named plans.
Name
Goals
Acknowledgements
To create a new plan for a member
Open the member's profile
Select Life Plan, then View Plans
Click New Plan, then select Create New Plan
Give the plan a name
Begin adding goals to the plan
Deleting Goals
When a goal is made inactive or marked as complete, its tasks continue to appear correctly on any past service records created while the goal was active. Your historical records are never affected by changes to a goal’s current status.Exporting Life Plan Goal Data
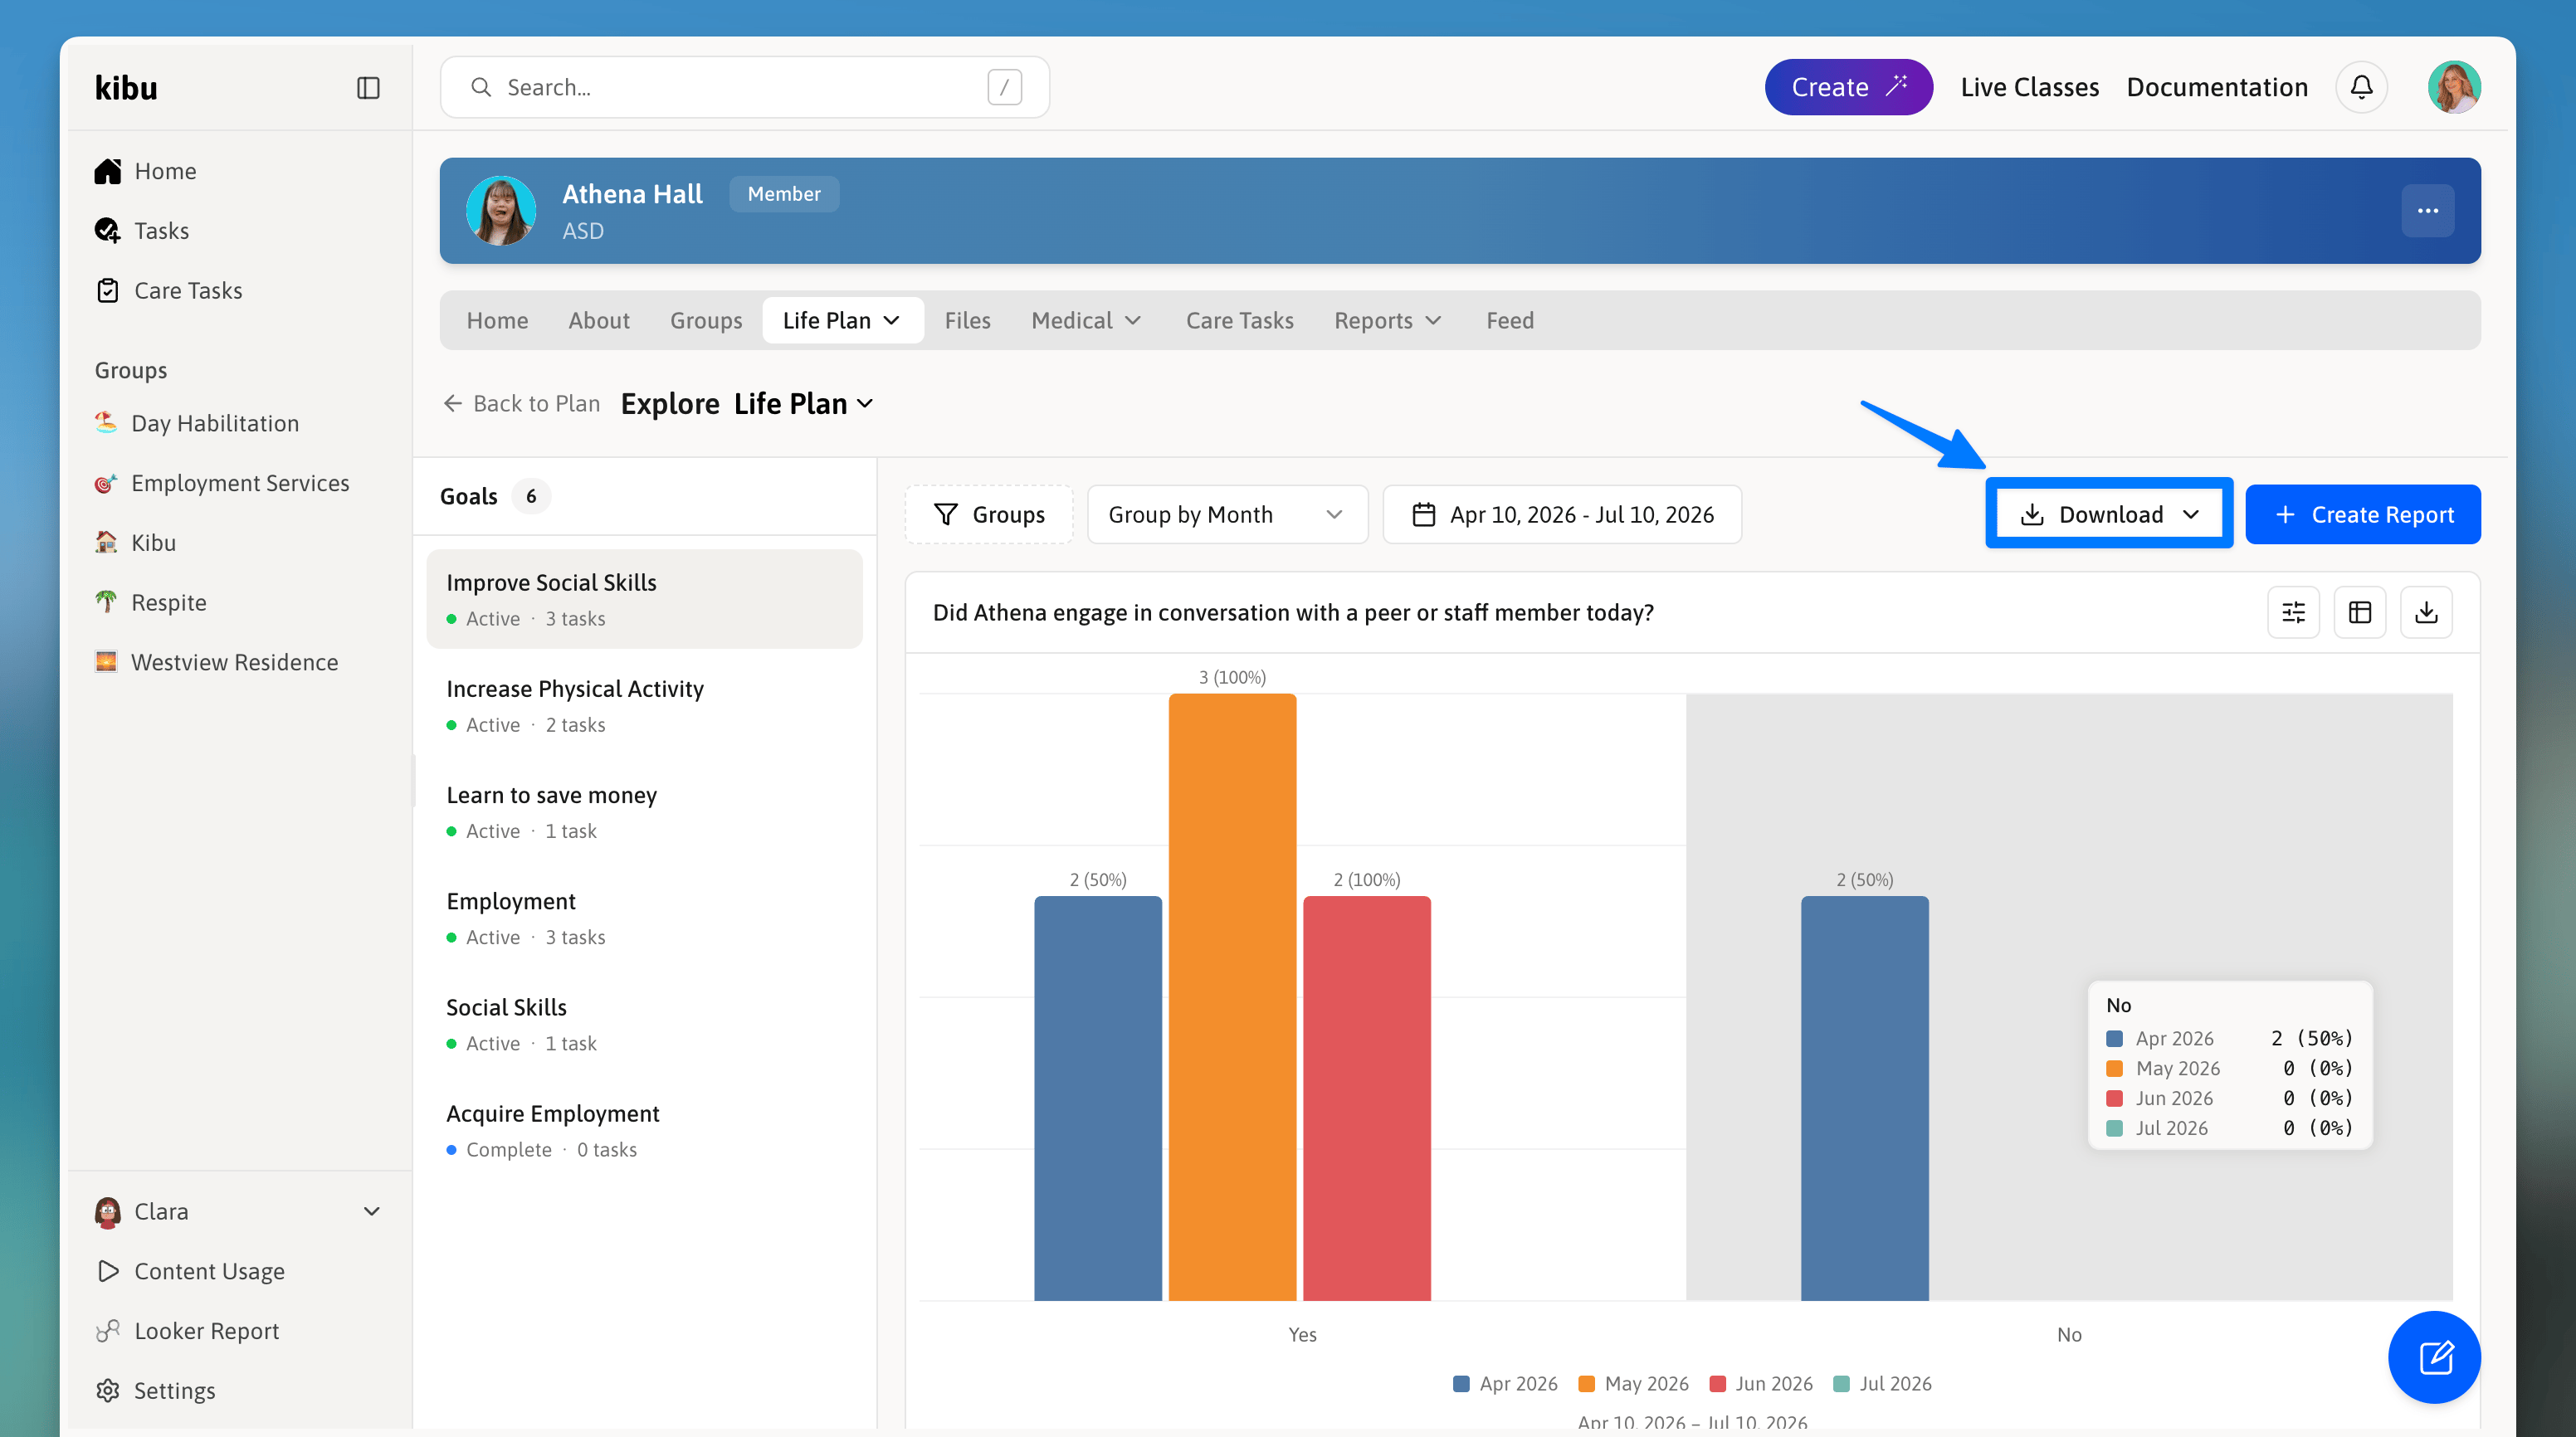
The Explore page showing export and download options.
Single Goal
All Goals
Progress Graphs
To export
Open the member's profile and select Life Plan, then Explore
Select the goal you would like to export
Press the download button to choose your export format
Best Practices
Writing Effective Goals
Writing Effective Goals
- Be specific and measurable
- Use clear, simple language
- Focus on observable behaviors
- Include success criteria
- Set realistic timeframes
Documentation Considerations
Documentation Considerations
- Use consistent terminology
- Include relevant context
- Document both successes and challenges
- Note any modifications needed
Progress Monitoring
Progress Monitoring
- Review progress regularly
- Adjust goals as needed
- Document any goal modifications